January 08, 2015

Orange-Almond-Olive Oil-Cake

One of my absolute favourite cakes! It's slightly bitter from the orange and lemon rind, not too sweet, but stays perfectly moist for days. Not everybody will like it, as it is not very sweet and has a sharp citrus taste and an underlying bitterness.
 
I love it. I made it several years ago, then again this week and before it was even finished, I decided that I would have to make it again. Very soon.
 
This is the recipe that I used, with the slight change of using two medium oranges and a little more almonds (about 190g instead of 170g). To adjust for the increased amount of orange pulp, I added a little more flour. Also, I had to bake it much longer than indicated in the recipe, but that's completely normal with my oven.

Not a carrot cake...

September 27, 2014

Daring Bakers September 2014 Challenge - Kolaches

The September Daring Bakers’ challenge was brought to us by Lucie from ChezLucie. She challenged us to make a true Czech treat – Kolaches!

We had a choice of three different recipes (details can be found here) and I decided to make the Chodské koláče (Kolache from Chodsko) because I love quark and poppyseed. 

The recipe for the dough worked great - nice silky and soft texture. I'm not sure the poppyseed filling was optimal - it wasn't as homogenous as I expected it to be. And since I didn't have a good piping bag my patterns turned out a bit rough :-) But the taste was excellent!

Thanks for a fun challenge, Lucie!

Kolache, cut up in pieces
Finished Kolache


July 27, 2014

Daring Bakers' July 2014 Challenge - Surprise Cake

For the July Daring Baker’s Challenge, Ruth from The Crafts of Mommyhood challenged us to bake a cake. But not just any cake; she asked us to add in a special surprise for our eyes as well as our taste buds! Her instructions can be found here.


Now, there are many fun surprise cakes out there. There's rainbow cakes, checkerboard cakes, there's cakes with hidden shapes inside or with filled with chocolates.


But for me this challenge was the perfect opportunity to finally tackle the Mondrian Cake. Ever since I bought Caitlin Freeman's formidable book of Modern Art Desserts earlier this year, I wanted to try my hands on this pièce de résistance.


The cake is not per se difficult to make, but it requires mainly lots of time. The first step is to bake cakes in 4 different colours and let them cool over night. The next day the cakes have to be cut into different sized strips and glued together with chocolate ganache. In the end, the whole cake is covered in chocolate ganache.

The cake Caitlin Freeman suggests is Rose Levy Beranbaum's White Velvet Cake, tinted with food colouring for the coloured strips. I used a little more salt (3/4 Tsp.) and replaced the 300g cake flour with 250g all purpose white flour and 50g corn starch.

Here are the cut up strips before I started covering them in the chocolate ganache
The cake was quit firm and cutting the strips was not as difficult as I thought it would be. But as it turned out, my chocolate ganache was too liquid and seeped into the cake. This means that the lines between the squares are not as clean as they should be. At least the pattern is still clearly visible, so I'm pretty happy with it, considering it was my first try.

Blurry lines, but still clearly a Mondrian Cake :-)
The next day I was wondering what to do with all the leftover cake. While the cake itself has a nice taste, I still felt it needed a bit more. It is quite a sweet cake and I thought it would pair nicely with a little fruity acidity. So I cut the leftover cake into slices and filled it with lemon curd, passion fruit curd, whipped cream with raspberry jam or caramel spread. With the pieces and crumbs that were too small to be filled, I made cake pops. I crumbled them up in the food processor, mixed them with a little chocolate ganache, shaped them into little balls and covered them in chocolate icing. In the end, it took quite some time to make use of all the leftover cake, but I just couldn't throw perfectly fine cake out. And my office liked that they got so many extra sweets.

From back to front: red cake with raspberry cream, white cake with caramel spread, yellow cake with lemon curd, blue cake with passion fruit cake and cake pops
Thanks for a great challenge, Ruth!

June 27, 2014

Daring Bakers' June 2014 Challenge - Cinnamon Rolls (no cinnamon required)

This month the Daring Bakers kept our creativity rolling with cinnamon bun inspired treats. Shelley from C Mom Cook dared us to create our own dough and fill it with any filling we wanted to craft tasty rolled treats, cinnamon not required! The recipe can be found here.

Well, that was fun! I made the rolls with a filling of quark (a kind of curd cheese, common in Switzerland) and cranberries, as I don't care for cinnamon. The dough didn't rise as much as I would have wanted to, but that might have been because I had not quite enough yeast left when I made the rolls. Also, the dough was quite wet so I had to add a lot more flour. I left out the glaze as the rolls were already quite moist from the filling. 

The rolls were delicious nevertheless :-)

Cinnamon free cinnamon rolls


June 11, 2014

Picknick "at the Beach"

A few years ago I prepared a picknick at the beach for some friends. Unfortunately, due to weather circumstances, we had to turn it into a picknick on the balcony. The food was delicious anyway and it made serving the different dishes a bit easier in the end.


So, here's the selection of dishes that I prepared. Most of them can be prepared well in advance, making them ideal for packing up and taking them to the your preferred picknick place (should you be luckier with the weather). 

Fruit Punch

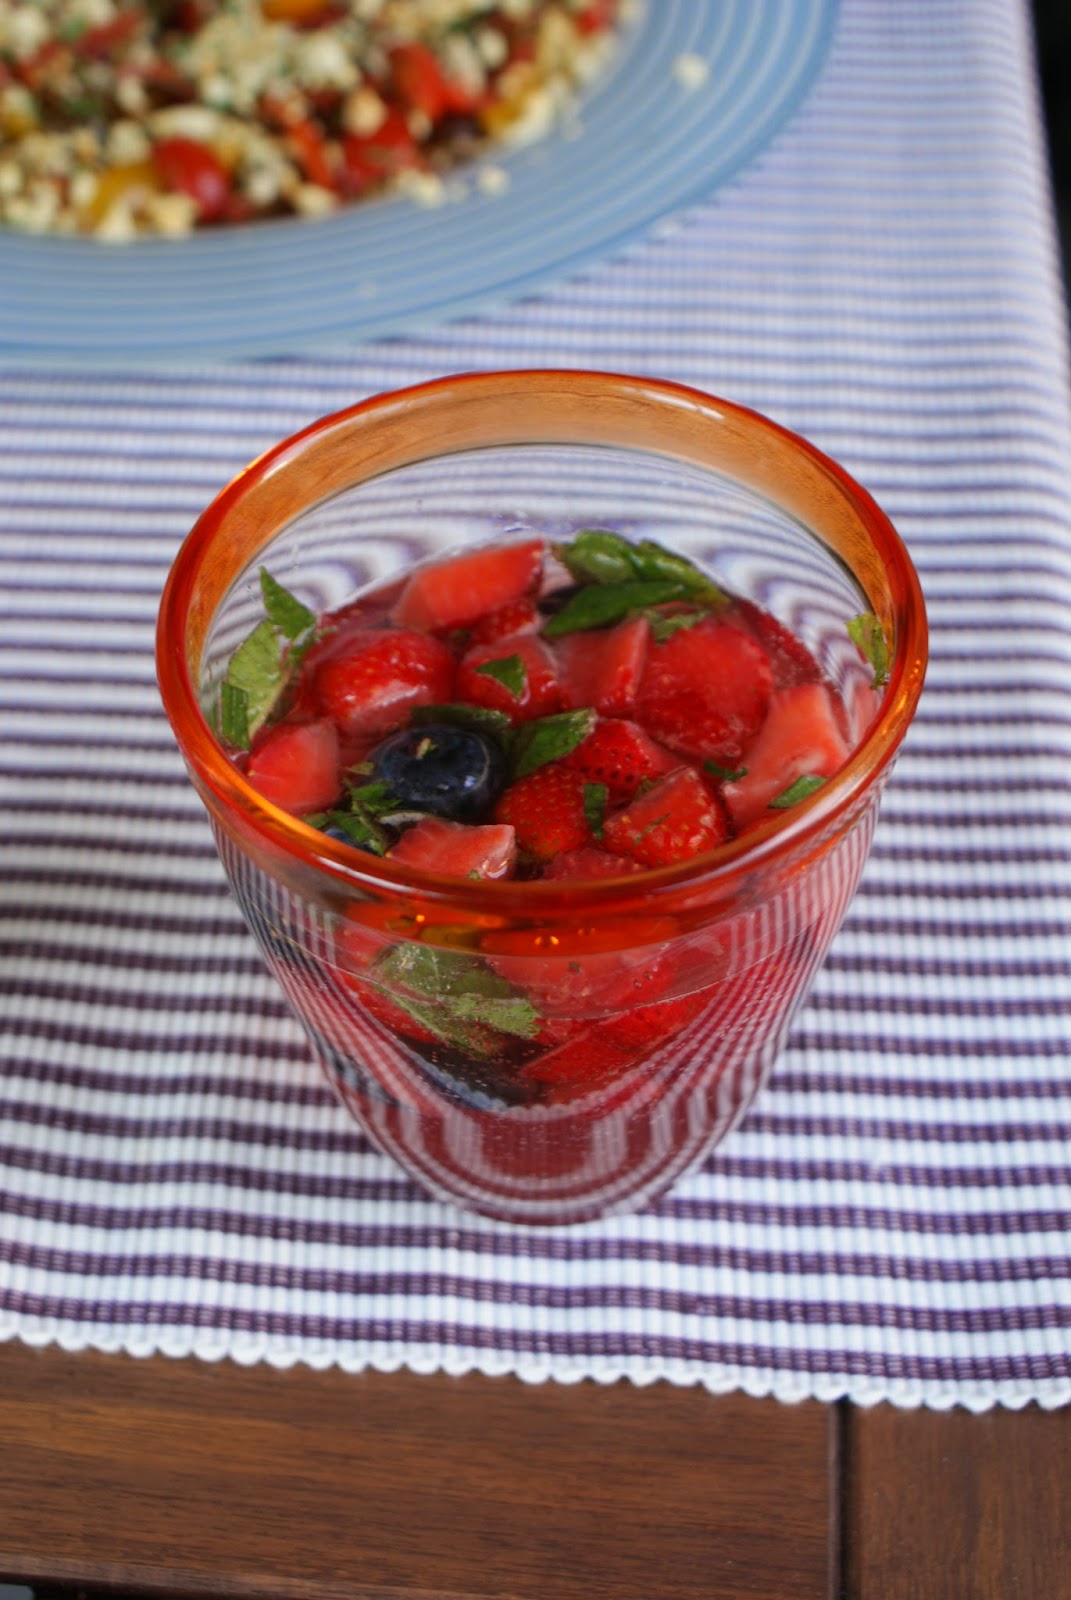
To start the evening off, we had a fruit punch with strawberries, blueberries and mint. It's best to soak the chopped fruit for a few hours in some of your preferred alcohol of choice (e.g. half a bottle of white wine) with some sugar or syrup or fruit liqueur. I usually add some fresh lemon juice as well, because I like a little acidity in my drinks. Keep the infusion in the fridge and ideally transport it in a cold box. At the picknick, spoon some fruit and liquid into the glasses and top off with cold sparkling wine. If you want the punch to contain less alcohol, use lemonade or sparkling mineral water instead.


Tomato Salad with Almonds

For food, I prepared two different salads. Firstly, I simply chopped up various kinds of cherry tomatoes and topped them with toasted and chopped almonds and breadcrumbs. The dressing was a simple Italian dressing of aceto balsamico, olive oil, basil, salt and pepper.


Pea and Feta Salad

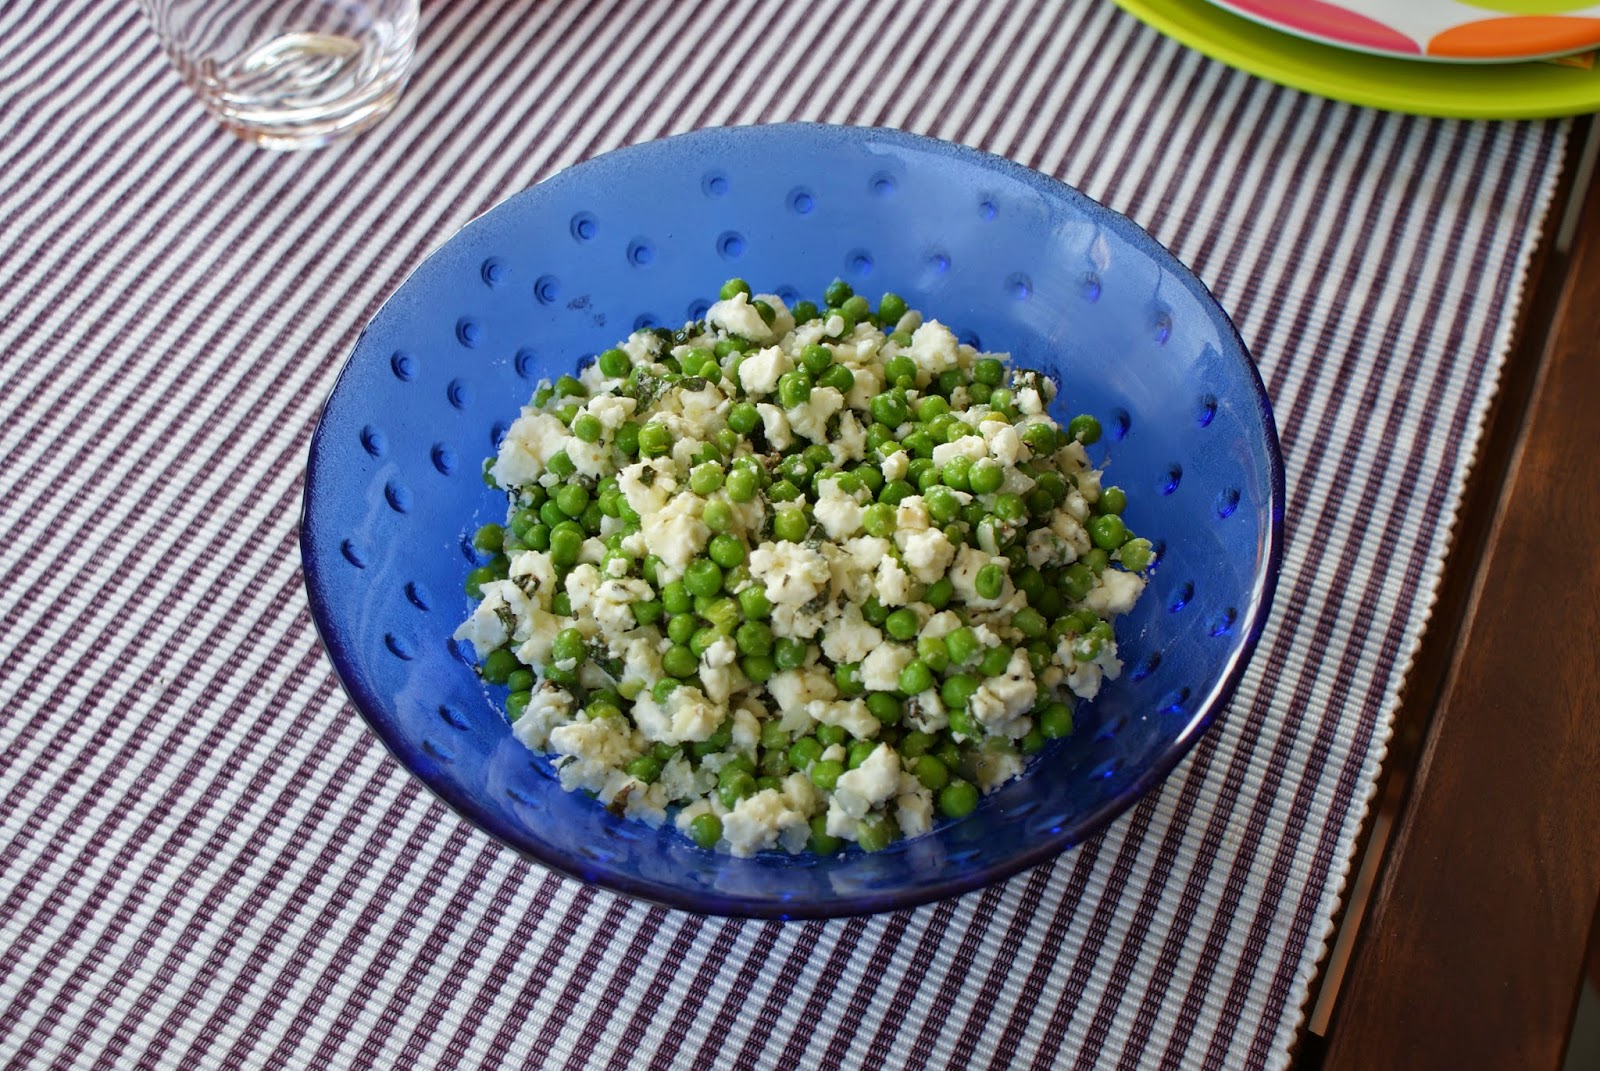
The second salad was a pea and feta salad. It's very simple to make. Just chop up a small onion and a clove of garlic and fry it in some olive oil until the dices are soft. Blanch some peas (ca. 300g) and immediately chill them in ice water to preserve their lovely green colour. Dice about 150g of feta and mix it with the peas and onions and some herbs (e.g. mint). Add some aceto balsamico, olive oil and season to taste with salt and pepper.


Salmon Ceviche

The recipe for the salmon ceviche can be found here. I left out the coriander because I don't really like the taste and the ceviche was great without it. This seems to be the most difficult recipe for a picknick, as the fish should not be brined in the lime juice for too long. It's probably best to keep the fish-mix and the lime juice separate until you've arrived at the picknick spot.


Cold Turkey Breast with Herb Vinaigrette

This recipe can be found here.


Pork Rolls with BBQ Sauce

I found this recipe in one of my many food magazines. Basically, it's pork neck steaks, marinated in garlic, mustard, honey, diced peperoncini, then spread on some pizza dough, seasoned with salt. The dough is then rolled up and cut into slices. Before baking, brush the rolls with some whisked egg.


Cheddar Cheesecake with Whisky Jelly

For dessert I made Tim Anderson's cheddar cheesecake with whisky jelly. As soon as I saw him prepare this cheesecake in the finals of BBCs Masterchef (and subsequently winning it), I knew I had to try it: I love cheddar, I love whisky, and there's certainly nothing wrong with cheesecake. And I'm so glad that I tried it. His cheesecake base is the best I've encountered in my baking life. The cheesecake itself isn't too sweet and has a nice, but not overpowering flavour of cheddar. The jelly is quite spicy because of the ginger beer, and it's definitely not something for people that don't like whisky. Actually, the whole cheesecake is probably more for the adventurous eater, so it was perfect for my friends and me. I've just discovered, that the recipe can no longer be found on the BBC Food website (it's been three years after all), so it's a good thing I still have my printout :-)


Actually, looking at the picture now, I wish I'd taken the time to tidy up the cheesecake a bit. But it was the end of the evening and I remember we didn't feel like waiting for dessert much longer. Guess I'll just have to make it once more - just for the pictures, of course…

January 29, 2012

Daring Bakers' January 2012 Challenge - Scones

Audax Artifex was our January 2012 Daring Bakers’ host. Aud worked tirelessly to master light and fluffy scones (a/k/a biscuits) to help us create delicious and perfect batches in our own kitchens!

I managed to find British strawberry jam, but unfortunately no clotted cream...
Now, I've written about scones before on my blog, but thought this would be an interesting opportunity to test a new recipe variation. I liked the idea of getting more layered scones, but unfortunately it didn't work out as expected. My scones looked and tasted pretty much the same as always (which isn't a bad thing!). Maybe I used too much flower. It couldn't have been the recipe as it seemed to have worked for many other Daring Bakers. Details can be found here. I used the basic recipe with the addition of ca. 20g of brown sugar.

Ah well, the scones were delicious as always. Thank you for hosting our January challenge, Audax!

November 27, 2011

Daring Bakers' November 2011 Challenge - Sans Rival


Catherine of Munchie Musings was our November Daring Bakers’ host and she challenged us to make a traditional Filipino dessert – the delicious Sans Rival cake! And for those of us who wanted to try an additional Filipino dessert, Catherine also gave us a bonus recipe for Bibingka which comes from her friend Jun of Jun-blog.

I chose to do the Sans Rival with the traditional flavouring of vanilla and cashew nuts. The details of the recipe can be found here.


The Sans Rival basically consists of two components: meringues plates filled with vanilla flavoured buttercream. Now, this is the third time I tried my hands at making meringues in one or the other form. Maybe it's the fact that meringues are not among my favourite desserts, but I wasn't surprised, when I struggled with what appeared to be a simple recipe. I baked the meringue plates according to the instructions and they turned a lovely brown, but were still quite humid and not as crispy as they should be. I left them to dry for a couple of days but when I wanted to assemble the Sans Rival, they were still gooey. So I baked them again for about an hour at about 100°C leaving the oven door slightly ajar. They turned darker, but in the end they were dry and crisp.

Even though I'd never made buttercream before, the recipe was quite straightforward and I got an excellent result.

The assembled dessert was a huge success at my friend's brunch and at my office - everybody loved it. While I also liked the taste and constancy of the Sans Rival, I found it a bit rich and heavy with all the buttercream. But the cashew nuts in the meringue added a nice contrast.

Thanks for another fun challenge - Catherine!

October 27, 2011

Daring Bakers' October 2011 Challenge - Povitica

Even my little ghost family was interested in this dessert
The Daring Baker’s October 2011 challenge was Povitica, hosted by Jenni of The Gingered Whisk. Povitica is a traditional Eastern European Dessert Bread that is as lovely to look at as it is to eat!

Povitica consists of a simple yeast dough, rolled out thinly and filled with a mix of walnuts, sugar and spices. Details and the recipe can be found here.

It is indeed a delicious recipe and also quite simple to make (I used the quarter batch measurements). The only change was to let the dough rise over night in the fridge, which worked extremely well.

Thanks for another great challenge!


September 30, 2011

Daring Bakers' September 2011 Challenge - Croissants

My first (and probably only) homemade croissants
The Daring Bakers go retro this month! Thanks to one of our very talented non-blogging members, Sarah, the Daring Bakers were challenged to make Croissants using a recipe from the Queen of French Cooking, none other than Julia Child!

I'm horribly late posting this challenge, but I'm just glad that I made it at all. It's been busy lately... To be honest I was always a bit afraid of making my own puff pastry, but I was astonished at how well this recipe works (details can be found here). Even though I spread making the croissants over three days, they still felt, tasted and looked like real croissants. Of course the store-bought variety is a bit fluffier but they were quite good for a first try. Especially the ones with the chocolate in them... :-)

June 27, 2011

Daring Bakers' June 2011 Challenge - Baklava

Sweet, sweet Baklava
This months Daring Bakers Challenge was called "From Phyllo to Baklava". We had to prepare this turkish/moroccan/eastern european treat from scratch, the main difficulty being to roll the dough as thinly as possible.

Erica of Erica’s Edibles was our host for the Daring Baker’s June challenge. Erica challenged us to be truly DARING by making homemade phyllo dough and then to use that homemade dough to make Baklava. The detailed recipe can be found here.

I was amazed at how well the recipe worked. I didn't think it would be possible to make such a simple dough that can be stretched out so thinly. But it worked flawlessly. The only downside was that I had sore muscles for about three days after preparing the Baklava. First, the dough had to be kneaded for 20 minutes by hand. After letting the dough rest for a while, rolling the individual sheets took me about 1.5 hours. The next day I had sore muscles not only in my arms and shoulders, but even in my abdomen and fingers…

Techniquewise the recipe was rather simple. I more or less stuck to the suggested filling (omitting the allspice berries, because I couldn't find any) and varying a little on the weights for the various nuts. I basically tried to use up, what I already had in my cupboard. Unfortunately I can't give you the exact measurements as I'm currently on vacation in Sweden and my notes are still in my flat in Zurich, even though I knew I was going to write up this post here. I need a better checklist next time…

I might have overbaked the Baklava a little because I expected them to get a darkbrowner colour on top. This might have also been due to the fact that my oven only works with bottom heat as it is a rather old gas oven.


The other thing that went slightly wrong was the soaking in sirup. Not thinking about the whole procedure very much, I used a springform pan to bake the Baklava. Since springform pans are put together from two separate parts, they are not closely sealed and so, when I poured the sirup over the hot Baklava, it leaked from the underside of the pan… I ended up transferring the Baklava to a lower pan and soaking in in there. Of course this meant that only about the lower half of my Baklava was actually soaking in the sirup, with the upper half remaining dry. I poured some sirup over it every now and then, but obviously this never could have the same effect as soaking over night.

Ah well, the end result was pretty tasty anyway and everybody at work loved it!

Thanks for another exciting challenge, Erica!

May 27, 2011

Daring Bakers' May 2011 Challenge - Chocolate Marquise

The May 2011 Daring Bakers’ challenge was hosted by Emma of CookCraftGrow and Jenny of Purple House Dirt. They chose to challenge everyone to make a Chocolate Marquise. The inspiration for this recipe comes from a dessert they prepared at a restaurant in Seattle.

Doesn't it look great when all components come together?
And what a challenge this was! Each single part was not too difficult to master, but the complete dessert consisted of several components and handling the frozen chocolate mousse was no easy task. But it was all worth it for such a plate of dessert.

I was very excited that this month's challenge included torched meringue because this was an excellent opportunity to break in my brand new blowtorch. Yay! :-)

The chocolate mousse obviously was the star of this plate. It tasted great and while preparing it, I realised how easy it is to modify it with different spices. And while I cut it into classical cube shapes for this challenge, it would be a cute idea to use cookie cutters to serve it in other shapes. As far as I could see, some of my fellow Daring Bakers already did this. The taste and consistency of the mousse was simply delicious: rich, dark and not too sweet - just the way I like my chocolate mousse.

The caramel sauce was maybe my favourite part of this challenge. I'm not very experienced with caramel and was amazed at how easy this recipe was. I love the slight bitter taste (maybe I burnt the caramel a bit?) together with the salt and rum (which I substituted for the tequila). There's still some sauce left in my fridge and I'm already planning on what to do with it. Maybe I could use it to bake some special cupcakes? Or I'll just eat it with a spoon…

My first plating. Well, the first that was worthy to be photographed, anyway...
Loved the spiced almonds! This is also a great snack that can be varied with all different kinds of spices and flavors. Unfortunately, I misunderstood the recipe (memo to self: "whisk egg white until frothy and thick" does not equal "whisk until stiff") and overbeat the egg white. After baking the almonds, I had to break them out of the egg white casing. The taste was still great, although I suspect that some of that spicy flavour  was lost in the discarded egg white… I'll definitely try this recipe again!

Plating was no easy feat. The cubes were quite difficult to handle if they should stay neat and the cocoa powder seemed to go everywhere. On the pictures you can see two different platings, but I used up several more plates until I was satisfied with the result. Also, I cheated and put the chocolate mousse on the plate while it was still frozen, because obviously for the picture it did not have to be thawed. Until I was finished with taking pictures and started eating my plate, the mousse had the exact right temperature and consistency :-)

Details of the recipes can be found here. I made only half of the chocolate mousse and used rum instead of tequila and maple sirup instead of light corn sirup. In the caramel sauce I also substituted the tequila with rum. For the spiced almonds I picked several spices from my spice cupboard (coriander seeds, cardamom, cinnamon, cayenne pepper, nutmeg, clove and salt).

My favourite plating
Thanks for a great challenge Emma and Jenny!

May 17, 2011

White Chocolate Tart with Raspberries

Basically, this is a simple tart with very straightforward flavours. But I was intrigued by the idea of subtly changing these flavours with the use of differently flavoured chocolates. The original recipe uses pears and a chocolate flavoured with pears. I decided to use raspberries as fruit and cranberry flavoured chocolate. You could use many different combinations of fruit and flavours. You could even start to play with flavoured yoghurt.

A word on the dough: I was confused at first that there was no sugar added according to the recipe. But it turned out that the filling with all the chocolate is quite sweet, so the neutral dough gives a nice contrast.

The recipe is quite easy. It requires a lot of cooling time, though. But the result is worth it. The combination of flaky dough, creamy filling and fruit is great!


White Chocolate Tart with Raspberries
Original recipe found on the webpage of Saisonküche, one of my favourite food magazines. Here's a translation:

Dough
250g flour
2 pinches of salt
150g cold butter
1 egg

Filling
40g dark chocolate (I used Cranberry Intense of the Excellence line of Lindt

3 leaves of gelatin
250g white chocolate (I used the Crema Catalana of the Supreme line of Chocolat Frey
2dl cream
150g non-flavoured yoghurt
300g raspberries

Combine flour and salt in a bowl. Cut butter into little cubes and add to the flour. Using your fingers, rub the butter and the flour together until you get a coarse mix resembling grated cheese. Work quickly to avoid the butter melting. Add the lightly beaten egg and assemble everything into a firm dough. Leave it to cool in the fridge for at least 30 minutes.

Preheat the oven to 180°C. Prepare a round baking tray (roughly 28cm in diameter) with a sheet of parchment paper. Roll out the dough on a lightly floured surface to about 3mm thickness. Place the dough into the baking tray, cut off the excess dough and punch some holes into the dough using a fork. Cover the dough with another sheet of parchment paper and add some baking weights to blind-bake the dough (I usually use dry beans). Bake for about 10 minutes, then remove the baking weights and continue to bake for another 15-20 minutes, then let it cool completely.

Melt the dark chocolate over a water bath and apply a thin layer to the cooled and baked dough. This will insulate the dough from the moist filling and keep it nice and crispy.

Soak the gelatin in some cold water. Heat the cream in a pan (it does not need to cook). Remove from the stove and add the roughly chopped white chocolate. Squeeze the water from the gelatin and add it to the cream as well. Stir until the gelatin and the chocolate have melted completely, then add the yoghurt. Cool in the fridge for a few minutes until the mix starts to set around the edge. In the meantime sprinkle the raspberries on the dough, then add the cream-chocolate mix. Let the tart set in the fridge for at least 2 hours.

May 03, 2011

Williams Crown and My First Blogging-Anniversary

Wow - it has already been a year since I started this blog! Time really does fly…

I've decided to celebrate this anniversary by pouring myself a cocktail. And not just any cocktail, but the Williams Crown!

Great cocktail - even without foam...
A few weeks ago I spent a weekend with a friend in the beautiful Hotel Post in Tyrol. Apart from enjoying some relaxing SPA-treatments, we also discovered a great new cocktail. While chatting to the Chef de Bar Oliver, he mentioned he had created his own cocktail recently. Obviously, we had to try it, especially since it contained Williams, one of my favourite spirits. The cocktail was delicious with an intense fruity smell and taste despite being light in texture - very drinkable (read "dangerous")!

Oliver was kind enough to share the recipe with us, so I can share it with you. It contains to the Fizz-family. To accommodate modern restaurant hygiene regulations it is made with soda water only, leaving out the raw egg white that would traditionally be included. The raw egg white does not alter the taste of the drink, but makes sure that there is a nice foam on top of the drink. To be honest, Oliver's version had a nice foam layer on top even without the egg white, unlike mine - maybe the soda water I used did not contain enough carbon dioxide. But enough moaning about no-foams, here is the recipe:

4cl Williams (since this component gives the main flavour, it is advisable to use a decent brand)
2.5cl Pear Juice
dash Soda Water (I used ca. 4cl)
dash Sugar Sirup (recipe can be found here, I used ca. 2cl)
dash Lemon Juice (I used ca. 2cl)

Shake everything hard for about 30s in your shaker with ice and strain into nice glass decorated with a slice of pear. To get all the flavour into the drink, pour some additional soda water (I used ca. 4cl again) into the shaker to rinse it and to get the rest of the aroma into the glass.

Cheers! To another year of blogging!

April 27, 2011

Daring Bakers' April 2011 Challenge - Maple Mousse in Tuile Basket with Sugar Cage

The April 2011 Daring Bakers’ challenge was hosted by Evelyne of the blog Cheap Ethnic Eatz. Evelyne chose to challenge everyone to make a maple mousse in an edible container. Prizes are being awarded to the most creative edible container and filling, so vote on your favorite from April 27th to May 27th at http://thedaringkitchen.com!

Yay - Sugar cage :-)
The recipe for the maple mousse and some suggestions for edible containers can be found here.

While I personally was intrigued by the idea of combining the maple mousse with bacon I quickly realised that I would not find many willing guinea pigs to help me eat this dessert. So I decided to stick to something more traditional and made tuile baskets. Tuiles were on my to-bake-list for a while now so I was happy to finally have a reason to try them out. I used this recipe and was surprised at how quick and easy it was. Ok, my tuiles were not browned evenly, but I blame this on my oven (yes, I do this a lot) and my impatience when trying to spread the dough on the sheet. But I still got some nice baskets to serve the mousse in.

The maple mousse itself had a great taste and everybody loved it. I used 4 sheets of gelatine (could not find powdered gelatine) but would reduce this to 3 sheets the next time. The mousse was fine and had the ideal consistency to spoon it into the tuile baskets and take nice pictures, but to eat it prefer a softer texture.


To decorate the mousse I tried my hands at a caramel cage. It actually worked better than I imagined. I actually managed to produce a little cage that did not break when plating the mousse... Also, the little sugar web underneath the tuile adds a nice contrast to the white plate (although, when looking at the finished plate, I realized, that I could have achieved the same effect with a maple sirup design, ah well...). All in all I again enjoyed this challenge. Now go check out the amazing creations of the other Daring Bakers and vote for your favourite edible container on The Daring Kitchen.

March 27, 2011

Daring Bakers' March 2011 Challenge - Meringue Coffee Cake

The March 2011 Daring Baker’s Challenge was hosted by Ria of Ria’s Collection and Jamie of Life’s a Feast. Ria and Jamie challenged The Daring Bakers to bake a yeasted Meringue Coffee Cake.


Details to the recipe can be found here. I pretty much stuck to their suggestions, because chocolate and nuts is a great combination - no need to change anything… Well, ok, I used hazelnuts instead of walnuts, left out the cinnamon and used fresh yeast instead of dried yeast. But for the rest of the recipe I followed their suggestions and I'm really glad that I did because the dough turned out beautiful - very soft, silky and smooth. The taste of the finished cake was great as well. The cake was firm, but still soft and moist from the meringue. It wasn't too sweet - which I liked - and the chocolate chips and hazelnuts added a nice contrast.

It's a great cake for Sunday brunch or afternoon coffee and it's not complicated to make. I'll definitely have to put it on my list to bake again!

February 28, 2011

Daring Bakers' February 2011 Challenge - Panna Cotta and Florentine Cookies

The February 2011 Daring Bakers’ challenge was hosted by Mallory from A Sofa in the Kitchen.  She chose to challenge everyone to make Panna Cotta from a Giada De Laurentiis recipe and Nestle Florentine Cookies.

All the information about the challenge can be found here.


I felt neither too creative nor too adventurous this month. Also, March 1 is the birthday of a close friend and his favourite dessert is the classical panna cotta, so I decided to stick with the basic recipe for vanilla panna cotta and raspberry gelée. I couldn't obtain powdered gelatin so I used sheet gelatin instead. Here's my recipe variation:

1st Layer of Panna Cotta


120ml of whole milk
360ml of whipping cream
20ml of honey
1 tbsp of sugar
1 pinch of salt
1 vanilla bean
4 sheets of gelatin

2nd Layer of Panna Cotta

120ml of whole milk
360ml of whipping cream
40ml of honey
1 tsp of sugar
1 vanilla bean
4 sheets of gelatin

I let the sheet gelatin soak in cold water while preparing the rest of the panna cotta. In a pan I combined the milk, cream, honey, sugar and salt. I added the seed from the vanilla bean and the empty vanilla bean and let everything simmer for 15min while whisking frequently. I removed the pan from the heat and added the gelatin after squeezing the water from it. Then I strained it to remove the vanilla beans and other vanilla bean particles and poured the panna cotta into prepared glasses. For the second layer I let the panna cotta cool to room temperature before layering it on top of the raspberry gelée.

Raspberry Gelée

250g of frozen raspberries
60ml of freshly squeezed orange juice
60g of brown sugar
2 sheets of gelatin

I let the gelatin soak in cold water. The raspberries, orange juice and sugar were puréed in a blender. Since the raspberries were not completely defrosted yet, I had to warm up the fruit purée in a pan to bring it to room temperature. I squeezed the gelatin and let it melt in a little pan before adding it to the raspberry purée and layering everything on top of the panna cotta.

I liked the end result. Although, for my taste, the panna cotta should have had a softer texture. While preparing the raspberry gelée, I had the impression, that I didn't use enough gelatin. It took a long time for the gelée to set and I was relieved that pouring a second layer of panna cotta onto the gelée was possible without any trouble. But when I sampled the end result I was delighted to find that the gelée almost turned into a purée again, therefore mixing all the better with the panna cotta.

For the Florentine Cookies I tried to stick to Mallory's suggested recipe but could not find dark corn syrup, so I used half honey, half molasses instead. Also, I reduced the sugar to 130g because some other Daring Bakers mentioned in the forums that they were quite sweet. I loved the chewy texture and the caramel flavour of the cookies. To coat them with chocolate, I poured a spoonful of chocolate on a parchment paper and pressed a cookie with the flat side down onto the chocolate. Unfortunately, the caramel flavour was a bit overpowered by the chocolate, but I still liked the cookies. 

Oh, and in case you are wondering about the decoration in the background of the picture: carnival season is about to start in Switzerland :-)

December 27, 2010

Daring Bakers' December 2010 Challenge - Stollen

Christmas is over and it's time for the monthly Daring Bakers' Challenge.


The 2010 December Daring Bakers’ challenge was hosted by Penny of Sweet Sadie’s Baking. She chose to challenge Daring Bakers’ to make Stollen. She adapted a friend’s family recipe and combined it with information from friends, techniques from Peter Reinhart’s book.........and Martha Stewart’s demonstration.

In Switzerland, Stollen (or Christstollen, as it's usually called here) is pretty common in December and it's among my favourite Christmas food, even though I usually try to find a variation without candied fruit peel (I'm just not very fond of that stuff). I don't remember if I've made Stollen myself before. If I have, it must have been years ago, but I certainly didn't realise / remember that it was such a simple procedure. And the result was amazing. I loved this recipe so much, that I decided to make a second Stollen and give it away as Christmas gifts. Also the fact that I cut up the first one quite quickly and started to eat it before I could take a picture may have had something to do with it...

Anyway, the recipe can be found here. I used fresh yeast (about 30g) instead of the dried yeast and I substituted dried raisins with dried cranberries and the candied fruit peel and cherries with roughly chopped dried apricot (which, in my opinion, give a nice counterbalance to the sweet dough and sugar coating). Also, I reduced the vanilla extract to 1 tsp. and the lemon extract to 0.5 tsp. Following Audax' recommendation I added a few strings of marzipan (storebought, due to lack of time).

Thanks for a great recipe, Penny, I will certainly add it to my repertoire of homemade Christmas goodies!

December 15, 2010

Cheesefondue

For the last few weeks it has been pretty cold, wet and dark in Zurich. There's only one good thing about this weather: it's Fondue-time!


Ingredients per person

1 tbsp of corn starch
5 cl of Kirsch
1 clove of garlic
1 dl of dry white whine
1 dash of lemon juice
200g grated cheese (e.g. half Gruyère, half Vacherin Fribourgeois)
freshly ground black pepper
200g white bread, cut in dices (I like it with a lot of crust, e.g. Baguette)

Dissolve the corn starch in the Kirsch. Put the mix aside for the moment.

Cut the garlic clove in half and rub down the Caquelon (Fondue pan) with it. Bring the white wine to a boil together with the garlic and the lemon juice. Add the grated cheese and let it melt, stirring constantly in a figure 8.

As soon as all the cheese is melted, add the corn starch-Kirsch-mix and bring everything to the boil until the cheese and the wine have combined. Keep stirring all the time. Season with black pepper.

Keep the Fondue warm over a Rechaud (small burner) and dip the bread cubes in the cheese.

E Guete!

November 27, 2010

Daring Bakers' November 2010 Challenge - Crostata

The 2010 November Daring Bakers’ challenge was hosted by Simona of briciole. She chose to challenge Daring Bakers’ to make pasta frolla for a crostata. She used her own experience as a source, as well as information from Pellegrino Artusi’s Science in the Kitchen and the Art of Eating Well.

The recipe and instructions can be found here.

I couldn't decide what flavour of crostata to make so I made three sweet variations and a savoury crostata.

Of course I had to have something with chocolate. So for my first crostata I made version 1 of the pasta frolla and substituted 30g of the sugar for cocoa powder and used orange zest instead of lemon zest. After blind baking it I lined the crust with orange segments and poured a ganache of chili-chocolate, cream and orange zest over it.

Chocolate-Chili
For the second crostata I made again version 1 of the pasta frolla using half vanilla sugar and half superfine sugar. Also, I added lime zest instead of lemon zest. I blind baked the crust and filled it with a mix of lime zest, lime juice, condensed milk and sour cream. For stability I added a little gelatine.

Lime
With the third crostata I went a bit experimental. I made another batch of version 1 of pasta frolla with half vanilla sugar and half superfine sugar, blind baked little crostatas (crostati? what's the plural of crostata?) and filled them with a mix of sour cream, goat cream cheese, honey, thyme, gelatine and whipped cream. After the filling had set I sliced up some figs and layered them on top, then drizzled everything with a little honey. They actually tasted great - although you have to like goat cheese to enjoy them. Also, I'd probably reduce the sugar in the crust a little as it was very sweet compared to the filling.

Goatcheese and Figs
After seeing all the delicious savoury versions that the other Daring Bakers made, I had to try one myself. I decided to make an onion-bacon-crostata. It's actually a dish that is quite common in many areas of Switzerland (Zwiebelwähe). I made version 1 of the pasta frolla, omitting the sugar and the lemon zest, but adding another pinch of salt (as it turned out, ideal would have been 3-4 pinches at least - but it was edible as it was).

Onion-Bacon-Cumin
For the filling I cut up loads of onions and sweated them in a little olive oil until they were tender. Added some fried bacon cubes and a little cumin and spread everything on the crust. I prepared a mix of sour cream, eggs, a little milk, salt and pepper and poured everything evenly on the onions. Then I topped everything with grated gruyère cheese and baked it until it was golden brown.

Goes great with a glass of white wine
This crostata tastes great when it's still warm, but can also be eaten cold the next day and it goes great with a glass of fruity white wine.

Thanks for a great challenge, Simona!