Showing posts with label Cake. Show all posts

January 08, 2015

Orange-Almond-Olive Oil-Cake

One of my absolute favourite cakes! It's slightly bitter from the orange and lemon rind, not too sweet, but stays perfectly moist for days. Not everybody will like it, as it is not very sweet and has a sharp citrus taste and an underlying bitterness.
 
I love it. I made it several years ago, then again this week and before it was even finished, I decided that I would have to make it again. Very soon.
 
This is the recipe that I used, with the slight change of using two medium oranges and a little more almonds (about 190g instead of 170g). To adjust for the increased amount of orange pulp, I added a little more flour. Also, I had to bake it much longer than indicated in the recipe, but that's completely normal with my oven.

Not a carrot cake...

July 27, 2014

Daring Bakers' July 2014 Challenge - Surprise Cake

For the July Daring Baker’s Challenge, Ruth from The Crafts of Mommyhood challenged us to bake a cake. But not just any cake; she asked us to add in a special surprise for our eyes as well as our taste buds! Her instructions can be found here.


Now, there are many fun surprise cakes out there. There's rainbow cakes, checkerboard cakes, there's cakes with hidden shapes inside or with filled with chocolates.


But for me this challenge was the perfect opportunity to finally tackle the Mondrian Cake. Ever since I bought Caitlin Freeman's formidable book of Modern Art Desserts earlier this year, I wanted to try my hands on this pièce de résistance.


The cake is not per se difficult to make, but it requires mainly lots of time. The first step is to bake cakes in 4 different colours and let them cool over night. The next day the cakes have to be cut into different sized strips and glued together with chocolate ganache. In the end, the whole cake is covered in chocolate ganache.

The cake Caitlin Freeman suggests is Rose Levy Beranbaum's White Velvet Cake, tinted with food colouring for the coloured strips. I used a little more salt (3/4 Tsp.) and replaced the 300g cake flour with 250g all purpose white flour and 50g corn starch.

Here are the cut up strips before I started covering them in the chocolate ganache
The cake was quit firm and cutting the strips was not as difficult as I thought it would be. But as it turned out, my chocolate ganache was too liquid and seeped into the cake. This means that the lines between the squares are not as clean as they should be. At least the pattern is still clearly visible, so I'm pretty happy with it, considering it was my first try.

Blurry lines, but still clearly a Mondrian Cake :-)
The next day I was wondering what to do with all the leftover cake. While the cake itself has a nice taste, I still felt it needed a bit more. It is quite a sweet cake and I thought it would pair nicely with a little fruity acidity. So I cut the leftover cake into slices and filled it with lemon curd, passion fruit curd, whipped cream with raspberry jam or caramel spread. With the pieces and crumbs that were too small to be filled, I made cake pops. I crumbled them up in the food processor, mixed them with a little chocolate ganache, shaped them into little balls and covered them in chocolate icing. In the end, it took quite some time to make use of all the leftover cake, but I just couldn't throw perfectly fine cake out. And my office liked that they got so many extra sweets.

From back to front: red cake with raspberry cream, white cake with caramel spread, yellow cake with lemon curd, blue cake with passion fruit cake and cake pops
Thanks for a great challenge, Ruth!

June 11, 2014

Picknick "at the Beach"

A few years ago I prepared a picknick at the beach for some friends. Unfortunately, due to weather circumstances, we had to turn it into a picknick on the balcony. The food was delicious anyway and it made serving the different dishes a bit easier in the end.


So, here's the selection of dishes that I prepared. Most of them can be prepared well in advance, making them ideal for packing up and taking them to the your preferred picknick place (should you be luckier with the weather). 

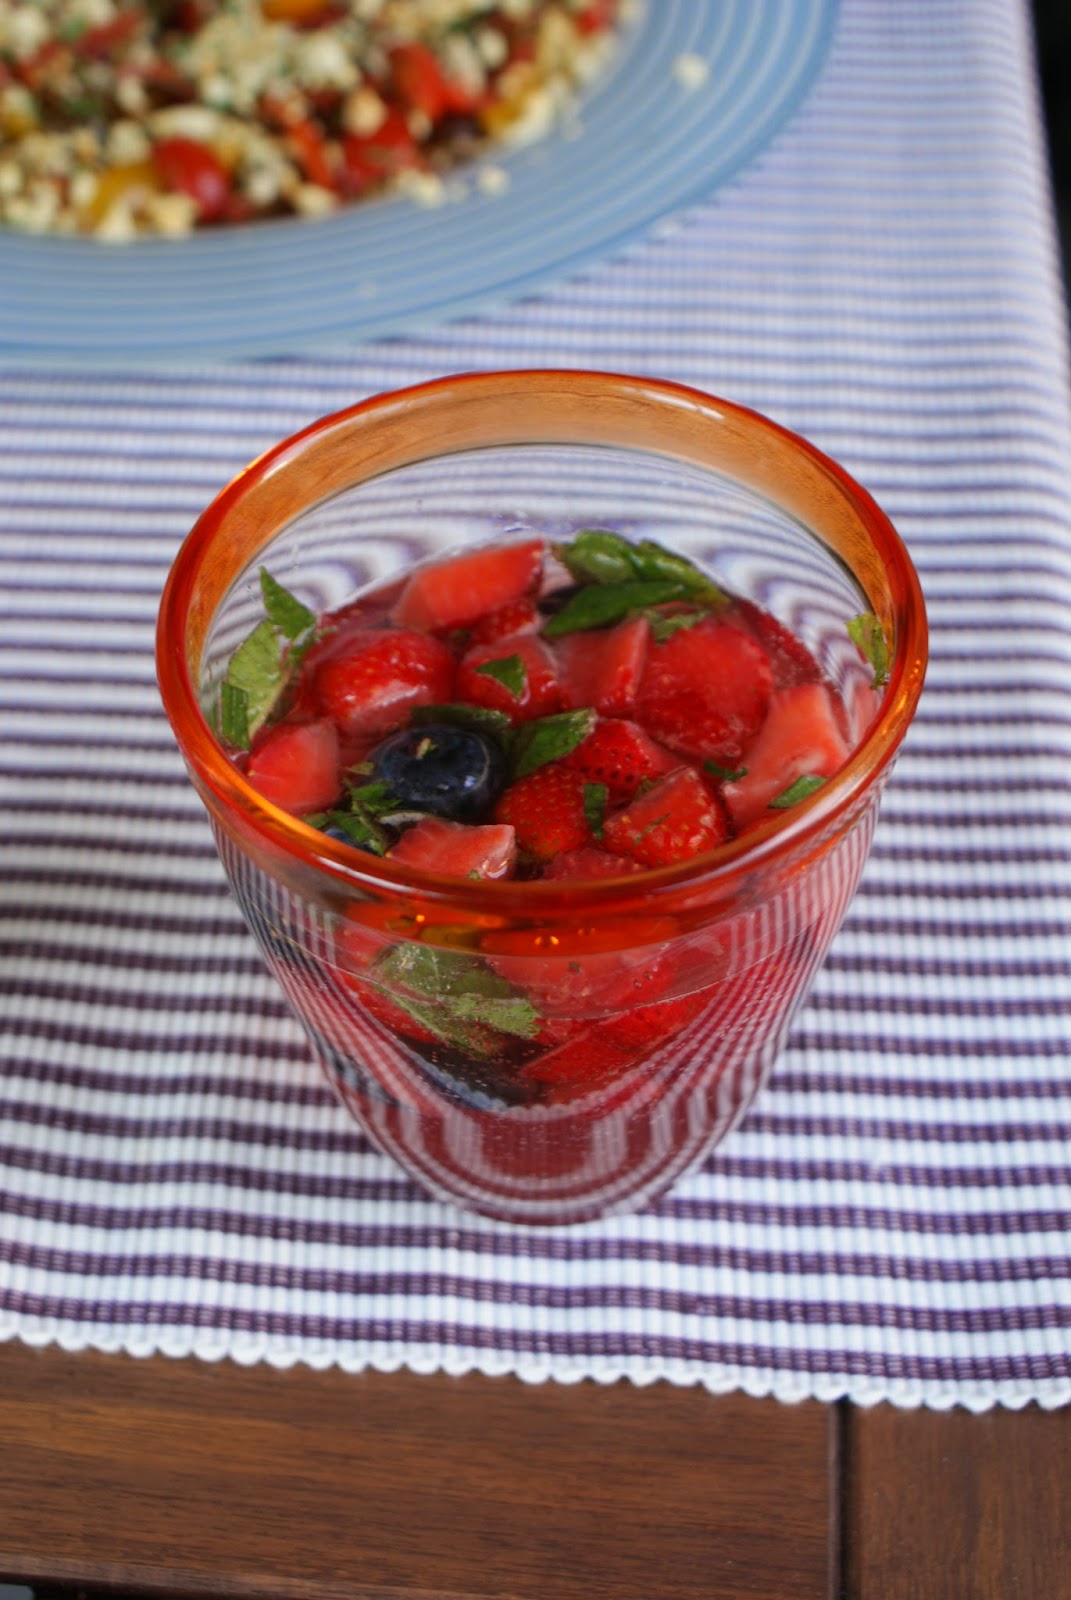
Fruit Punch

To start the evening off, we had a fruit punch with strawberries, blueberries and mint. It's best to soak the chopped fruit for a few hours in some of your preferred alcohol of choice (e.g. half a bottle of white wine) with some sugar or syrup or fruit liqueur. I usually add some fresh lemon juice as well, because I like a little acidity in my drinks. Keep the infusion in the fridge and ideally transport it in a cold box. At the picknick, spoon some fruit and liquid into the glasses and top off with cold sparkling wine. If you want the punch to contain less alcohol, use lemonade or sparkling mineral water instead.


Tomato Salad with Almonds

For food, I prepared two different salads. Firstly, I simply chopped up various kinds of cherry tomatoes and topped them with toasted and chopped almonds and breadcrumbs. The dressing was a simple Italian dressing of aceto balsamico, olive oil, basil, salt and pepper.


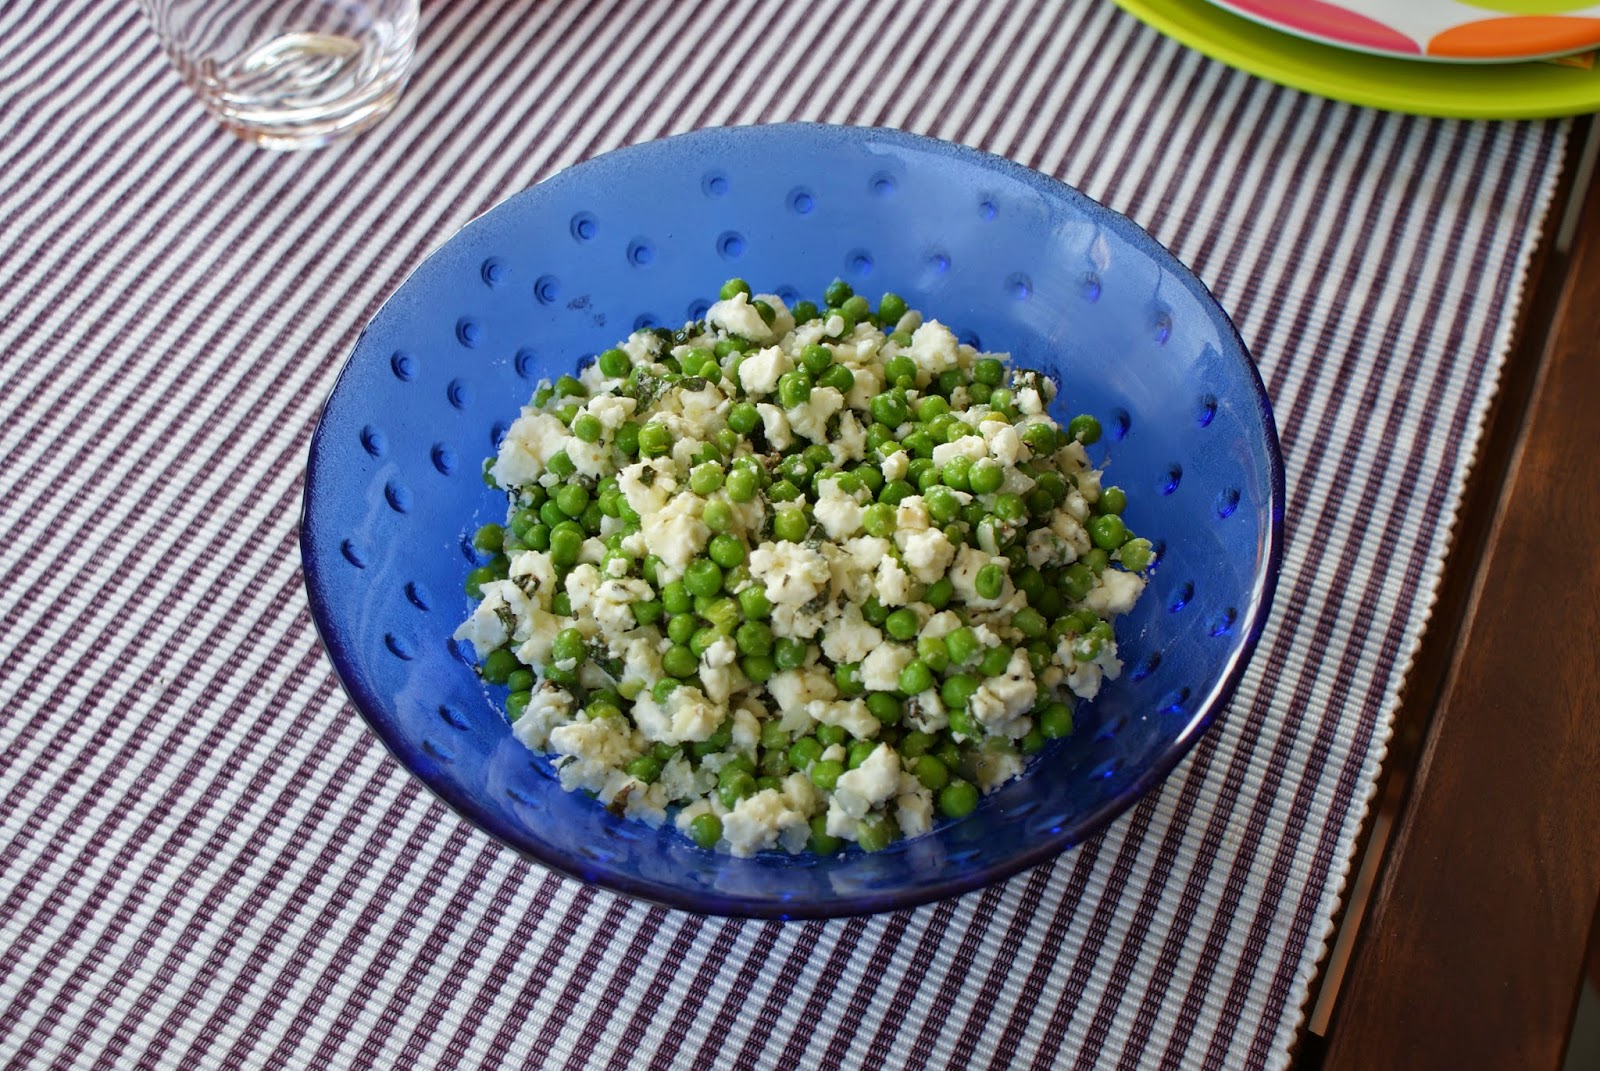
Pea and Feta Salad

The second salad was a pea and feta salad. It's very simple to make. Just chop up a small onion and a clove of garlic and fry it in some olive oil until the dices are soft. Blanch some peas (ca. 300g) and immediately chill them in ice water to preserve their lovely green colour. Dice about 150g of feta and mix it with the peas and onions and some herbs (e.g. mint). Add some aceto balsamico, olive oil and season to taste with salt and pepper.


Salmon Ceviche

The recipe for the salmon ceviche can be found here. I left out the coriander because I don't really like the taste and the ceviche was great without it. This seems to be the most difficult recipe for a picknick, as the fish should not be brined in the lime juice for too long. It's probably best to keep the fish-mix and the lime juice separate until you've arrived at the picknick spot.


Cold Turkey Breast with Herb Vinaigrette

This recipe can be found here.


Pork Rolls with BBQ Sauce

I found this recipe in one of my many food magazines. Basically, it's pork neck steaks, marinated in garlic, mustard, honey, diced peperoncini, then spread on some pizza dough, seasoned with salt. The dough is then rolled up and cut into slices. Before baking, brush the rolls with some whisked egg.


Cheddar Cheesecake with Whisky Jelly

For dessert I made Tim Anderson's cheddar cheesecake with whisky jelly. As soon as I saw him prepare this cheesecake in the finals of BBCs Masterchef (and subsequently winning it), I knew I had to try it: I love cheddar, I love whisky, and there's certainly nothing wrong with cheesecake. And I'm so glad that I tried it. His cheesecake base is the best I've encountered in my baking life. The cheesecake itself isn't too sweet and has a nice, but not overpowering flavour of cheddar. The jelly is quite spicy because of the ginger beer, and it's definitely not something for people that don't like whisky. Actually, the whole cheesecake is probably more for the adventurous eater, so it was perfect for my friends and me. I've just discovered, that the recipe can no longer be found on the BBC Food website (it's been three years after all), so it's a good thing I still have my printout :-)


Actually, looking at the picture now, I wish I'd taken the time to tidy up the cheesecake a bit. But it was the end of the evening and I remember we didn't feel like waiting for dessert much longer. Guess I'll just have to make it once more - just for the pictures, of course…

November 27, 2011

Daring Bakers' November 2011 Challenge - Sans Rival


Catherine of Munchie Musings was our November Daring Bakers’ host and she challenged us to make a traditional Filipino dessert – the delicious Sans Rival cake! And for those of us who wanted to try an additional Filipino dessert, Catherine also gave us a bonus recipe for Bibingka which comes from her friend Jun of Jun-blog.

I chose to do the Sans Rival with the traditional flavouring of vanilla and cashew nuts. The details of the recipe can be found here.


The Sans Rival basically consists of two components: meringues plates filled with vanilla flavoured buttercream. Now, this is the third time I tried my hands at making meringues in one or the other form. Maybe it's the fact that meringues are not among my favourite desserts, but I wasn't surprised, when I struggled with what appeared to be a simple recipe. I baked the meringue plates according to the instructions and they turned a lovely brown, but were still quite humid and not as crispy as they should be. I left them to dry for a couple of days but when I wanted to assemble the Sans Rival, they were still gooey. So I baked them again for about an hour at about 100°C leaving the oven door slightly ajar. They turned darker, but in the end they were dry and crisp.

Even though I'd never made buttercream before, the recipe was quite straightforward and I got an excellent result.

The assembled dessert was a huge success at my friend's brunch and at my office - everybody loved it. While I also liked the taste and constancy of the Sans Rival, I found it a bit rich and heavy with all the buttercream. But the cashew nuts in the meringue added a nice contrast.

Thanks for another fun challenge - Catherine!

October 27, 2011

Daring Bakers' October 2011 Challenge - Povitica

Even my little ghost family was interested in this dessert
The Daring Baker’s October 2011 challenge was Povitica, hosted by Jenni of The Gingered Whisk. Povitica is a traditional Eastern European Dessert Bread that is as lovely to look at as it is to eat!

Povitica consists of a simple yeast dough, rolled out thinly and filled with a mix of walnuts, sugar and spices. Details and the recipe can be found here.

It is indeed a delicious recipe and also quite simple to make (I used the quarter batch measurements). The only change was to let the dough rise over night in the fridge, which worked extremely well.

Thanks for another great challenge!


May 17, 2011

White Chocolate Tart with Raspberries

Basically, this is a simple tart with very straightforward flavours. But I was intrigued by the idea of subtly changing these flavours with the use of differently flavoured chocolates. The original recipe uses pears and a chocolate flavoured with pears. I decided to use raspberries as fruit and cranberry flavoured chocolate. You could use many different combinations of fruit and flavours. You could even start to play with flavoured yoghurt.

A word on the dough: I was confused at first that there was no sugar added according to the recipe. But it turned out that the filling with all the chocolate is quite sweet, so the neutral dough gives a nice contrast.

The recipe is quite easy. It requires a lot of cooling time, though. But the result is worth it. The combination of flaky dough, creamy filling and fruit is great!


White Chocolate Tart with Raspberries
Original recipe found on the webpage of Saisonküche, one of my favourite food magazines. Here's a translation:

Dough
250g flour
2 pinches of salt
150g cold butter
1 egg

Filling
40g dark chocolate (I used Cranberry Intense of the Excellence line of Lindt

3 leaves of gelatin
250g white chocolate (I used the Crema Catalana of the Supreme line of Chocolat Frey
2dl cream
150g non-flavoured yoghurt
300g raspberries

Combine flour and salt in a bowl. Cut butter into little cubes and add to the flour. Using your fingers, rub the butter and the flour together until you get a coarse mix resembling grated cheese. Work quickly to avoid the butter melting. Add the lightly beaten egg and assemble everything into a firm dough. Leave it to cool in the fridge for at least 30 minutes.

Preheat the oven to 180°C. Prepare a round baking tray (roughly 28cm in diameter) with a sheet of parchment paper. Roll out the dough on a lightly floured surface to about 3mm thickness. Place the dough into the baking tray, cut off the excess dough and punch some holes into the dough using a fork. Cover the dough with another sheet of parchment paper and add some baking weights to blind-bake the dough (I usually use dry beans). Bake for about 10 minutes, then remove the baking weights and continue to bake for another 15-20 minutes, then let it cool completely.

Melt the dark chocolate over a water bath and apply a thin layer to the cooled and baked dough. This will insulate the dough from the moist filling and keep it nice and crispy.

Soak the gelatin in some cold water. Heat the cream in a pan (it does not need to cook). Remove from the stove and add the roughly chopped white chocolate. Squeeze the water from the gelatin and add it to the cream as well. Stir until the gelatin and the chocolate have melted completely, then add the yoghurt. Cool in the fridge for a few minutes until the mix starts to set around the edge. In the meantime sprinkle the raspberries on the dough, then add the cream-chocolate mix. Let the tart set in the fridge for at least 2 hours.

March 27, 2011

Daring Bakers' March 2011 Challenge - Meringue Coffee Cake

The March 2011 Daring Baker’s Challenge was hosted by Ria of Ria’s Collection and Jamie of Life’s a Feast. Ria and Jamie challenged The Daring Bakers to bake a yeasted Meringue Coffee Cake.


Details to the recipe can be found here. I pretty much stuck to their suggestions, because chocolate and nuts is a great combination - no need to change anything… Well, ok, I used hazelnuts instead of walnuts, left out the cinnamon and used fresh yeast instead of dried yeast. But for the rest of the recipe I followed their suggestions and I'm really glad that I did because the dough turned out beautiful - very soft, silky and smooth. The taste of the finished cake was great as well. The cake was firm, but still soft and moist from the meringue. It wasn't too sweet - which I liked - and the chocolate chips and hazelnuts added a nice contrast.

It's a great cake for Sunday brunch or afternoon coffee and it's not complicated to make. I'll definitely have to put it on my list to bake again!

September 15, 2010

Brown Butter Pound Cake

The August Daring Bakers Challenge was brown butter pound cake and ice cream. Either as a Baked Alaska or as a Petit Four.

A combination of different factors caused me to skip this months challenge. But I was still curious about the brown butter and the pound cake. When browning the butter, the milk protein precipitate from the melted butter, get caramelized and develop a nutty flavour. That's why it's also called nut butter. I thought I'd never had nut butter before, so I decided to just make the cake and leave away the rest of the challenge.


Browning the butter actually solved a childhood mystery. I remember eating vegetables (especially cauliflower) with butter drizzled over it. But the butter also contained little brown bits that I could never identify. If pressed for a guess I'd probably have gone with roasted breadcrumbs, but while browning the butter for this cake I realised that it was simply nut butter all along.

The recipe for the brown butter cake can be found here. It sounded easy enough - the only difficult part being browning the butter, but since the recipe started with "preheat the oven" I assumed it would not take very long. Wrong. It took about 30-40min. Of course I used a very low heat because I didn't want to burn the butter - maybe a second time I'd be braver and use a higher heat, but at least I got a good look at all the different stages of the browning butter.

Also, my freezer seems to be less cold than the average freezer, because instead of the indicated 15-30min it took the butter almost 1h to congeal again. Since I decided to bake the cake in a loaf pan instead of a baking tray of course the baking time doubled. Normally that wouldn't have been a problem but I had to catch a train to meet my friends and I ended up taking the cake out of the oven, putting it in a bag and leaving my flat 5min later. The whole tram and train smelled of cake. I thought it was lovely, but then i knew that I would get to taste the cake later on...
I served it with some store bought ice cream at my friends' place and the next day I had a slice with frozen cake filling that was left over when I made these cakes.

Can you see the little brown dots? That's the caramelized milk proteins from the nut butter.
This is a great cake. It tastes warm and nutty and of vanilla. It doesn't even need the ice cream - it's great just in itself. I'll definitely make that one again.

September 13, 2010

Wedding Cake

Well, no, it wasn't a really real wedding cake, but my neighbours got married and I decided to make them something sweet for when they came home again. I've wanted to try a red velvet cake for some time and a wedding seemed like the right opportunity.

So much for the plan. I'd never used food colouring before so didn't know what to expect and didn't worry when the dough was more of an orange-beige colour. I imagined the colourchange might happen during the baking. Well, that was not the case - the cake remained a light brown with a slight touch of orange.

In what universe is this a red velvet cake?
The taste was fine albeit a bit on the sweet side, so I continued with the filling and decorating. I used a recipe that I've found on Ms. Humble's Blog. Instead of baking it in a tray, I made three variations: 1. small springform pan (diameter 18cm), 2. small loaf pan (lenght 16cm), 3. even smaller cake ring (diameter 8cm).  The bigger round cake was to be the wedding cake, the loaf would be a birthday cake for a friend from work and the small round cake was my guinea pig-cake for the filling and the icing.

My little guinea pig cake
After cutting the cake in half, I covered the bottom half with a layer of the white chocolate cream cheese frosting, put the second half on top and did a crumb coat of the whole cake. Then I covered it with white fondant (store bought). I topped the wedding cake with little red hearts and the birthday cake with candy roses.

Wedding cake
Handling the fondant was easier than I thought. I even rolled it out much thinner than recommended because I wanted to make sure that I had enough for all three cakes and it didn't tear.

Birthday Cake

August 06, 2010

Nectarine Cake

This is a really delicious cake. In fact it's so good, I made it two days in a row. Or maybe the double baking was yet another sign of my onsetting baking OCD. When I made it for the first time, I forgot to add the peach liquor. This greatly irritated me for the whole day, so in the end I gave in and made the exact same cake again but this time with the peach liquor. AND I WAS RIGHT! Haha! The liquor intensified the overall peach flavour and added the little something to the cake. Of course the cake is perfectly alright also without the liquor. You still get a nice, tender cake with sweet nectarines, crunchy almond slices and chocolate chips (who needs an adjective with chocolate...?).


The recipe is a mix of various standard cake recipes and my own additions and I can't find my notes right now so I don't remember all the sources.

Nectarine-Cake
(with or without liquor)

30g butter at room temperature
2 egg yolks
60g sugar
25g vanilla sugar
250g yoghurt
2-3 tbsp peach liquor (optional)
250g semolina
2 tsp. baking powder
100g almond slices
160g chocolate chips
2 egg whites, beaten
1 pinch of salt
4 nectarines in slices
1 tbsp sugar to sprinkle

Preheat the oven to 175°C. Line the bottom of a springform tin (18cm diameter) and a 16cm loaf pan with baking paper and butter the sides.

Beat the butter, the egg yolks, sugar and vanilla sugar until fluffy. Mix in the yoghurt. If you want to use the peach liquor, this would be the moment not to forget to mix it in. Add the semolina, baking powder, almond slices and chocolate chips.

In a separate bowl beat the egg whites together with the salt until stiff. Fold the egg whites into the batter.

Pour half of the mix into the springform tin and tuck nectarine slices into the batter. Sprinkle a tablespoon of sugar over everything.

Pour half of the rest of the batter into the loaf pan, layer it with nectarines and cover the fruit with the remaining batter.

June 15, 2010

Tiroler Cake

The Tiroler Cake is one of the most popular cakes in Switzerland. It's really easy to make and has a rich hazelnut flavour with the occasional chocolate chip.


 There's loads of recipes on the internet. I've used this one:

125g butter (room temperature)
4 egg yolks
1 pinch of salt
150g sugar
120g flour
8g baking powder
200g ground hazelnuts
50g chopped hazelnuts
150g chocolate chips
4 beaten egg whites

Preheat the oven to 180°C.

In a big bowl beat the butter until it is lighter in colour and fluffy. Beat in the eggs one at the time, then add salt and sugar. Sift in the flour and baking powder and add the ground hazelnuts, the chopped hazelnuts and the chocolate chips. Mix everything together. Carefully fold in the beaten egg whites.

Pour into a buttered loaf pan (25-28cm length) and bake for 50-55min. After cooling, the cake can be easily stored for a few days.

May 07, 2010

Chocolate-Wine-Cake

This is one of my all-time favourite cakes. It is really quick and easy to make. And I've never met anyone who didn't like it. It is rich with chocolate and very moist and keeps for 2-3 days (it even gets better after a few days). Also, this cake is perfect for people who don't have much experience with baking as the recipe is extremely easy and very robust.


Although it is a great cake as it is, I felt like trying something a little different today. Since I made this cake for a friend who enjoys drinking wine, I used dessert wine to add a little twist.

Best Chocolate Cake Ever
Adapted from a recipe of Annemarie Wildeisen

200g butter
200g dark chocolate (I usually use chocolate with ca. 46% cocoa)
200g ground almonds
150g brown sugar
1 packet of vanilla sugar
1 pinch of salt
3 eggs
40g flour
2 tsp baking powder

Prepare a springform pan with a diameter of about 24-28cm (line the bottom with baking paper, butter and flour the side).
Preheat the oven to 160°C.

Melt the butter and roughly chopped chocolate over a water bath.


In a separate bowl mix the almonds, sugar, vanilla sugar and salt. Add the chocolate-butter-mix.

Lightly scramble the eggs and add them to the chocolate-mix.


Immediately before baking, add the flour and the baking powder. Quickly mix everything together, pour into the springform pan and bake for about 40-50 min.

To test if the cake is ready, insert a cake needle. If it comes out clean, the cake is ready, if there is still batter sticking to the needle let it bake for a few more minutes.


Once the cake is cool, sprinkle with icing sugar.


Chocolate-Wine-Cake


When adding the eggs, add also 100ml dessert wine. Use 60g of flour instead of 40g.


I found that the wine adds a fruity flavour and the chocolate flavour is not as heavy as it usually is. And it goes perfectly with a glass of dessert wine.

All in all, I'm really pleased with the outcome of today's experiment.