Hooray, my first challenge as a daring baker! It included everything that I expected from this project and more. Several components would not have been on my 'to-bake'-list because e.g. I'm not too fond of meringue, too afraid of crème anglaise and too unknowing to realise that mascarpone can be made at home with only two ingredients.
Who would have thought that these three recipes worked perfectly, but not the chocolate mousse that I expected to be the easiest part of it all...
The June 2010 Daring Bakers’ challenge was hosted by Dawn of Doable and Delicious. Dawn challenged the Daring Bakers’ to make Chocolate Pavlovas and Chocolate Mascarpone Mousse. The challenge recipe is based on a recipe from the book Chocolate Epiphany by Francois Payard.
Dawn's instructions can be found here. I followed them as closely as possible, the only change being that I substituted the Sambuca with Galliano, an Italian herb liquor, because I'm not very fond of aniseed liquor and also Galliano was readily available in my house bar. Homemade mascarpone was not part of the challenge, but since I read about it in a previous challenge, I wanted to try it.
An additional challenge that was not written directly into the recipe proved to be my gas oven. The meringues had to be baked at 95°C but my gas oven could not go lower than 130°C, so I decided to invade the kitchen of friends of mine for the weekend and do the complete challenge there (THANK YOU GUYS!). This approach had the additional advantage that I had somebody to help me eat the pavlovas.
I was surprised that making the chocolate meringues was easy and also the addition of chocolate greatly added to the taste. But what really surprised me was the crème anglaise. I always thought that vanilla curd was a bit boring, but the homemade stuff is amazing! I had to stop myself from eating it on the spot. So after more than three decades vanilla and I are finally friends.
What nearly drove me to the brink of despair was the chocolate mousse. When I added the chocolate to the hot cream, the mixture curdled immediately. I could save it by adding a few tablespoons of boiling water, but I guess it never completely recovered. Then, when preparing the mascarpone-cream-mix, it broke after only a few seconds of beating. I started again with a second batch of mascarpone (this time store bought because I did not have time to make another batch) and tried to be extra careful when adding the cream. It worked, but the mousse was never as moussy and stiff as I expected it to be. Also, the texture was a little grainy. The taste was exquisite, though :-)
Since this was my first challenge, I went a bit overboard with different platings...
This is my first try: crumbled up meringue, layered mousse and mascarpone-cream with raspberries.
Second plate: a meringue base with piped mousse (although it didn't keep it's form very well).
Third plate: again, a meringue base with a few spoonfuls of mousse and fresh fruit.
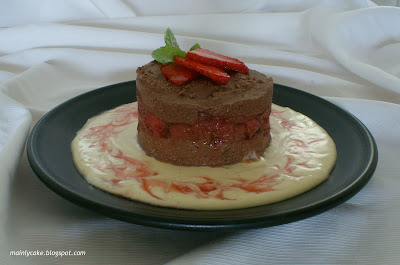
Fourth plate: I filled some of the mousse into a dessert ring, layered it with strawberries, and froze it for a couple of hours.
Fifth plate: same as before, but this time I layered the mousse with mango and passion fruit.


