December 27, 2010

Daring Bakers' December 2010 Challenge - Stollen

Christmas is over and it's time for the monthly Daring Bakers' Challenge.


The 2010 December Daring Bakers’ challenge was hosted by Penny of Sweet Sadie’s Baking. She chose to challenge Daring Bakers’ to make Stollen. She adapted a friend’s family recipe and combined it with information from friends, techniques from Peter Reinhart’s book.........and Martha Stewart’s demonstration.

In Switzerland, Stollen (or Christstollen, as it's usually called here) is pretty common in December and it's among my favourite Christmas food, even though I usually try to find a variation without candied fruit peel (I'm just not very fond of that stuff). I don't remember if I've made Stollen myself before. If I have, it must have been years ago, but I certainly didn't realise / remember that it was such a simple procedure. And the result was amazing. I loved this recipe so much, that I decided to make a second Stollen and give it away as Christmas gifts. Also the fact that I cut up the first one quite quickly and started to eat it before I could take a picture may have had something to do with it...

Anyway, the recipe can be found here. I used fresh yeast (about 30g) instead of the dried yeast and I substituted dried raisins with dried cranberries and the candied fruit peel and cherries with roughly chopped dried apricot (which, in my opinion, give a nice counterbalance to the sweet dough and sugar coating). Also, I reduced the vanilla extract to 1 tsp. and the lemon extract to 0.5 tsp. Following Audax' recommendation I added a few strings of marzipan (storebought, due to lack of time).

Thanks for a great recipe, Penny, I will certainly add it to my repertoire of homemade Christmas goodies!

December 15, 2010

Cheesefondue

For the last few weeks it has been pretty cold, wet and dark in Zurich. There's only one good thing about this weather: it's Fondue-time!


Ingredients per person

1 tbsp of corn starch
5 cl of Kirsch
1 clove of garlic
1 dl of dry white whine
1 dash of lemon juice
200g grated cheese (e.g. half Gruyère, half Vacherin Fribourgeois)
freshly ground black pepper
200g white bread, cut in dices (I like it with a lot of crust, e.g. Baguette)

Dissolve the corn starch in the Kirsch. Put the mix aside for the moment.

Cut the garlic clove in half and rub down the Caquelon (Fondue pan) with it. Bring the white wine to a boil together with the garlic and the lemon juice. Add the grated cheese and let it melt, stirring constantly in a figure 8.

As soon as all the cheese is melted, add the corn starch-Kirsch-mix and bring everything to the boil until the cheese and the wine have combined. Keep stirring all the time. Season with black pepper.

Keep the Fondue warm over a Rechaud (small burner) and dip the bread cubes in the cheese.

E Guete!

November 27, 2010

Daring Bakers' November 2010 Challenge - Crostata

The 2010 November Daring Bakers’ challenge was hosted by Simona of briciole. She chose to challenge Daring Bakers’ to make pasta frolla for a crostata. She used her own experience as a source, as well as information from Pellegrino Artusi’s Science in the Kitchen and the Art of Eating Well.

The recipe and instructions can be found here.

I couldn't decide what flavour of crostata to make so I made three sweet variations and a savoury crostata.

Of course I had to have something with chocolate. So for my first crostata I made version 1 of the pasta frolla and substituted 30g of the sugar for cocoa powder and used orange zest instead of lemon zest. After blind baking it I lined the crust with orange segments and poured a ganache of chili-chocolate, cream and orange zest over it.

Chocolate-Chili
For the second crostata I made again version 1 of the pasta frolla using half vanilla sugar and half superfine sugar. Also, I added lime zest instead of lemon zest. I blind baked the crust and filled it with a mix of lime zest, lime juice, condensed milk and sour cream. For stability I added a little gelatine.

Lime
With the third crostata I went a bit experimental. I made another batch of version 1 of pasta frolla with half vanilla sugar and half superfine sugar, blind baked little crostatas (crostati? what's the plural of crostata?) and filled them with a mix of sour cream, goat cream cheese, honey, thyme, gelatine and whipped cream. After the filling had set I sliced up some figs and layered them on top, then drizzled everything with a little honey. They actually tasted great - although you have to like goat cheese to enjoy them. Also, I'd probably reduce the sugar in the crust a little as it was very sweet compared to the filling.

Goatcheese and Figs
After seeing all the delicious savoury versions that the other Daring Bakers made, I had to try one myself. I decided to make an onion-bacon-crostata. It's actually a dish that is quite common in many areas of Switzerland (Zwiebelwähe). I made version 1 of the pasta frolla, omitting the sugar and the lemon zest, but adding another pinch of salt (as it turned out, ideal would have been 3-4 pinches at least - but it was edible as it was).

Onion-Bacon-Cumin
For the filling I cut up loads of onions and sweated them in a little olive oil until they were tender. Added some fried bacon cubes and a little cumin and spread everything on the crust. I prepared a mix of sour cream, eggs, a little milk, salt and pepper and poured everything evenly on the onions. Then I topped everything with grated gruyère cheese and baked it until it was golden brown.

Goes great with a glass of white wine
This crostata tastes great when it's still warm, but can also be eaten cold the next day and it goes great with a glass of fruity white wine.

Thanks for a great challenge, Simona!

October 27, 2010

Daring Bakers' October 2010 Challenge - Doughnuts and Berliner

This months Daring Bakers' Challenge was to make Doughnuts or Bombolonis (or Berliner, as we call them in Switzerland).

My first doughnut :-)
The October 2010 Daring Bakers challenge was hosted by Lori of Butter Me Up. Lori chose to challenge DBers to make doughnuts. She used several sources for her recipes including Alton Brown, Nancy Silverton, Kate Neumann and Epicurious.

The sugar adds a nice sweetness
To be honest, I was a bit afraid of deep frying. Partly because I've never done it before and partly because I currently have a kitchen with a gas stove and having an open flame next to a pot with boiling hot oil made me a tiny bit nervous. But everything worked out fine and I'm glad that I now can add one more cooking technique to my repertoire.

Yummie Berliner!
The recipe can be found here and was actually very simple in the making. The dough is a simple yeast dough which requires no special skills, except to be able to stick to a recipe and trust the many talented bakers before you who have designed it. The most important part is not to heat up the water and milk too much because you don't want to kill the yeast. Its ideal working temperature is around 40°C, much above and it will die. So keep everything lukewarm at the most. It is also important to knead the dough thoroughly (or work it in your stand mixer with the dough hook attachment for a few minutes). The third important thing when working with a yeast dough is to let it rise a proper amount of time. I actually changed Lori's recipe in this regard and took to Ms. Humble's advice for doughnuts and let my dough rise in the fridge over night. This also obliged me very much as I could spread out the challenge over two different evenings.

Some other changes I made: I substituted milk and butter with lactose free milk and lactose free butter (some girls at my office are lactose intolerant). Also, I used 540g of wheat flour and 110g of spelt flour because I ran out of wheat flour (what kind of a baker am I...?). Finally, I left out the nutmeg because I'm not particularly fond of it and 1 teaspoon seemed like an awful lot of it.

Many more - filled with crab apple jelly
I couldn't decide on the shape, so I made both doughnuts and small Berliner out of my yeast dough. The Berliner i filed with grape jelly or crab apple jelly (both not homemade) and rolled them in powdered sugar or caster sugar (to make sure I could distinguish them later on). 
 
The whole collection
 When tasting my first doughnut immediately after deep frying I was surprised at how unsweet it tasted. Then I realised that since I've let my dough rise for almost 24h the yeast had even more time to ferment the sugar. Next time I'd probably use a little more sugar in the dough. On the other hand, the not so sweet dough allowed me to make a chocolate glazing for the doughnuts (I chopped 120g dark chocolate, added 15g butter and melted it over a water bath, added a teaspoon of milk because the chocolate glazing was too thick, realised that this caused the chocolate to curdle, rescued it with a few teaspoons of warm tap water, lamented the fact that I seemed to have lost my chocolate karma, dipped the doughnuts in the glazing anyway) to balance out the tastes. I ran out of glazing so I rolled the rest of the doughnuts and the doughnut holes in caster sugar.

All in all I was very pleased with the whole experiment. This recipe is excellent, producing very soft doughnuts with a thin crisp crust. The chocolate or jam and sugar added the right amount of sweetness. Thanks for a great challenge, Lori!

October 19, 2010

Raspberry Chocolate Tarte


Another recipe that I've adapted from the great Ms. Humble's blog. I realised later that I've made a similar tarte several times before from the book "Verrückt nach Schokolade" (Crazy about Chocolate) by Trish Deseine. Whenever I made it I used store bought crust without chocolate because I was too lazy to make my own. When making this tarte I realized how easy it is to make my own shortcrust pastry and I'll probably never use store bought again.


Raspberry Chocolate Tarte
a variation of Ms. Humble's Bittersweet Chocolate Tarte

Shortcrust Pastry
150g powdered sugar
40g cacao powder
55g ground almonds
190g flour
1 pinch of salt
100g butter, cold
1 large egg

Line a big tarte pan (28cm diameter) or four small tarte pans (10cm diameter) with baking parchment or butter them.

Sift together the dry ingredients in a bowl. Cut the cold butter into little pieces, combine them with the flour-mix and rub everything together with your fingers until it is well mixed (at this stage it resembles grated cheese a little). Add the egg and quickly combine all the ingredients.

Press into the tarte pan and put in the freezer for at least two hours.

Preheat the oven to 175°C. Place a piece of baking parchment on the crust and add baking weights (dried beans will do an excellent job). Bake for about 10min, remove the weights and bake for another 8min until the crust is dry and light in colour. Cool on a wire rack.

Ganache Filling
300g dark chocolate, finely chopped
360ml heavy cream
a handful of fresh (or frozen) raspberries

Heat the cream to a simmer over medium heat (be careful not to let it burn) and pour over the chopped chocolate. Mix until the chocolate is completely melted and the mixture is smooth.

Scatter the raspberries on the crust, then pour on the ganache and let the tarte cool for at least an hour.


September 27, 2010

Decorated Sugar Cookies


The September 2010 Daring Bakers’ challenge was hosted by Mandy of "What the Fruitcake?!" Mandy challenged everyone to make Decorated Sugar Cookies based on recipes from Peggy Porschen and The Joy of Baking.

It definitely was a challenge for me as I don't usually decorate with Royal Icing. I don't have a very steady hand so I prefer things that don't require too much detail in the decorating. But then, the Daring Bakers challenges are all about trying out things one wouldn't normally do.


A part of the challenge was to decorate the cookies to the theme of September, whatever that meant to us. Since I am invited to four weddings this autumn - three of them in September alone - I decided to do red, white and pink hearts. Also, I figured it would be a relatively easy shape to pipe the icing on.

After my disaster with the Not-So-Red Velvet Cake I was a bit hesitant to work with food colouring again. But all white cookies would have been a bit boring, so I tried a different brand and discovered that luckily enough I've discovered the real stuff this time.


The recipe for the challenge and extensive instructions on icing techniques can be found here

September 22, 2010

Butterscotch Cookies

After a longer period of non-baking and a lot of hen night organisations and wedding preparations I couldn't wait to hit the kitchen again. Also, after almost a year of helping organizing this big event I felt a bit lost in the aftermath. And what better comfort could there be than cookies fresh from the oven. So I decided to try this recipe from Not So Humble Pie.


Butterscotch Cookies with White Chocolate Chips

adapted from Not So Humble Pie
 
175g flour
0.5 teaspoon baking soda
0.5 teaspoon salt
250g brown sugar
170g margarine, room temperature
1 teaspoon molasses
30g butter, room temperature
1 egg
seeds from one vanilla pod
225g white chocolate chips (or white chocolate, roughly chopped)

Preheat the oven to 175°C.

Sift together the flour, baking soda and salt.

In a separate bowl cream the butter, margarine, molasses and sugar together for 3-4min either using a handheld mixer or a stand mixer. The mixture will be light in colour and fluffy.

Add the egg and the vanilla seeds and continue beating until well mixed. Add the flour in several parts, mixing each portion until well combined.

In the end, mix in the chocolate chips.

Prepare a baking sheet with baking parchment and - using two teaspoons - place little heaps of dough on the parchment, leaving lots of space in between each ball (about 5cm).


Bake for 12-15min. Take out and eat immediately (or let them cool and share with your friends at work).

September 15, 2010

Brown Butter Pound Cake

The August Daring Bakers Challenge was brown butter pound cake and ice cream. Either as a Baked Alaska or as a Petit Four.

A combination of different factors caused me to skip this months challenge. But I was still curious about the brown butter and the pound cake. When browning the butter, the milk protein precipitate from the melted butter, get caramelized and develop a nutty flavour. That's why it's also called nut butter. I thought I'd never had nut butter before, so I decided to just make the cake and leave away the rest of the challenge.


Browning the butter actually solved a childhood mystery. I remember eating vegetables (especially cauliflower) with butter drizzled over it. But the butter also contained little brown bits that I could never identify. If pressed for a guess I'd probably have gone with roasted breadcrumbs, but while browning the butter for this cake I realised that it was simply nut butter all along.

The recipe for the brown butter cake can be found here. It sounded easy enough - the only difficult part being browning the butter, but since the recipe started with "preheat the oven" I assumed it would not take very long. Wrong. It took about 30-40min. Of course I used a very low heat because I didn't want to burn the butter - maybe a second time I'd be braver and use a higher heat, but at least I got a good look at all the different stages of the browning butter.

Also, my freezer seems to be less cold than the average freezer, because instead of the indicated 15-30min it took the butter almost 1h to congeal again. Since I decided to bake the cake in a loaf pan instead of a baking tray of course the baking time doubled. Normally that wouldn't have been a problem but I had to catch a train to meet my friends and I ended up taking the cake out of the oven, putting it in a bag and leaving my flat 5min later. The whole tram and train smelled of cake. I thought it was lovely, but then i knew that I would get to taste the cake later on...
I served it with some store bought ice cream at my friends' place and the next day I had a slice with frozen cake filling that was left over when I made these cakes.

Can you see the little brown dots? That's the caramelized milk proteins from the nut butter.
This is a great cake. It tastes warm and nutty and of vanilla. It doesn't even need the ice cream - it's great just in itself. I'll definitely make that one again.

September 13, 2010

Wedding Cake

Well, no, it wasn't a really real wedding cake, but my neighbours got married and I decided to make them something sweet for when they came home again. I've wanted to try a red velvet cake for some time and a wedding seemed like the right opportunity.

So much for the plan. I'd never used food colouring before so didn't know what to expect and didn't worry when the dough was more of an orange-beige colour. I imagined the colourchange might happen during the baking. Well, that was not the case - the cake remained a light brown with a slight touch of orange.

In what universe is this a red velvet cake?
The taste was fine albeit a bit on the sweet side, so I continued with the filling and decorating. I used a recipe that I've found on Ms. Humble's Blog. Instead of baking it in a tray, I made three variations: 1. small springform pan (diameter 18cm), 2. small loaf pan (lenght 16cm), 3. even smaller cake ring (diameter 8cm).  The bigger round cake was to be the wedding cake, the loaf would be a birthday cake for a friend from work and the small round cake was my guinea pig-cake for the filling and the icing.

My little guinea pig cake
After cutting the cake in half, I covered the bottom half with a layer of the white chocolate cream cheese frosting, put the second half on top and did a crumb coat of the whole cake. Then I covered it with white fondant (store bought). I topped the wedding cake with little red hearts and the birthday cake with candy roses.

Wedding cake
Handling the fondant was easier than I thought. I even rolled it out much thinner than recommended because I wanted to make sure that I had enough for all three cakes and it didn't tear.

Birthday Cake

August 06, 2010

Nectarine Cake

This is a really delicious cake. In fact it's so good, I made it two days in a row. Or maybe the double baking was yet another sign of my onsetting baking OCD. When I made it for the first time, I forgot to add the peach liquor. This greatly irritated me for the whole day, so in the end I gave in and made the exact same cake again but this time with the peach liquor. AND I WAS RIGHT! Haha! The liquor intensified the overall peach flavour and added the little something to the cake. Of course the cake is perfectly alright also without the liquor. You still get a nice, tender cake with sweet nectarines, crunchy almond slices and chocolate chips (who needs an adjective with chocolate...?).


The recipe is a mix of various standard cake recipes and my own additions and I can't find my notes right now so I don't remember all the sources.

Nectarine-Cake
(with or without liquor)

30g butter at room temperature
2 egg yolks
60g sugar
25g vanilla sugar
250g yoghurt
2-3 tbsp peach liquor (optional)
250g semolina
2 tsp. baking powder
100g almond slices
160g chocolate chips
2 egg whites, beaten
1 pinch of salt
4 nectarines in slices
1 tbsp sugar to sprinkle

Preheat the oven to 175°C. Line the bottom of a springform tin (18cm diameter) and a 16cm loaf pan with baking paper and butter the sides.

Beat the butter, the egg yolks, sugar and vanilla sugar until fluffy. Mix in the yoghurt. If you want to use the peach liquor, this would be the moment not to forget to mix it in. Add the semolina, baking powder, almond slices and chocolate chips.

In a separate bowl beat the egg whites together with the salt until stiff. Fold the egg whites into the batter.

Pour half of the mix into the springform tin and tuck nectarine slices into the batter. Sprinkle a tablespoon of sugar over everything.

Pour half of the rest of the batter into the loaf pan, layer it with nectarines and cover the fruit with the remaining batter.

July 27, 2010

Swiss Swirl Ice Cream Cake

Yay! My second challenge as a Daring Baker. It involved ice cream and a dessert that is apparently called Swiss Roll. In Switzerland it is known as "Roulade", but then in Germany a "Roulade" is a meat dish. So I'll better stick with Swiss Roll for this post.


The July 2010 Daring Bakers’ challenge was hosted by Sunita of Sunita’s world – life and food. Sunita challenged everyone to make an ice-cream filled Swiss roll that’s then used to make a bombe with hot fudge. Her recipe is based on an ice cream cake recipe from Taste of Home.

I completed the challenge three weeks ago for a barbecue with friends. But when it came to taking pictures my friends' camera wouldn't budge. Luckily I still had a smaller version of the ice cream cake in my fridge at home. So that's the one you can see on the pictures.

For the Swiss roll, including the vanilla cream filling and the fudge sauce I stuck to Sunita's recipes. For the ice creams I made white chocolate-stracciatella and grapefruit with chocolate chips. Especially the grapefruit ice cream was great! Will definitely have to do it again. Although the combination of the flavours was tasty, I would use different ice creams the next time with better matching colours... Luckily at the barbecue it was already dark when I served it :-)


I had some trouble with the Swiss roll. I hadn't done one in a while (like not for more than 20 years) and my pan was a little bigger than in the recipe, so probably they were too thin. Also, they stuck to the towel and were more in patches than anything else... So, when they were rolled, I put them in the freezer immediately to stabilise them for the cutting. This actually worked well, but the slices were not nice and round but more of an oblong shape. Well, I kind of liked them this way, anyway :-)

For the grapefruit ice cream I used Ms. Humble's recipe for pomegranate gelato. I substituted pomegranate juice with grapefruit juice and pomegranate liqueur with grapefruit liqueur. I also added a pinch of mustard powder, because I read it here that it intensifies the flavor. Thanks for the tip Audax. A word on the grapefruit liqueur: I never thought it would be so difficult to buy some. I would even have settled for grapefruit sirup or any kind of grapefruit flavoured alcohol (e.g. vodka). But in none of my trusted delicacy stores I could find any of those. And I didn't have the time to make my own grapefruit liqueur, because you have to infuse it for several weeks. I ended up taking the train to another town during my lunch break because I found out about a store that sold grapefruit liqueur there. Simply changing to a different flavour for the ice cream was just not an option. Talking about obsessing slightly about recipes...

For the White Chocolate-Stracciatella ice cream I used this recipe. Also with the addition of a pinch of mustard powder. I was also quite nice, but a little sweet for my taste.

I loved making the ice cream - I have never done this before and don't own an ice cream maker. It was still fairly easy to make them without it, the only problem was, that it took much longer for the ice cream to freeze than indicated in the recipes. Since I made them in the evening it meant that I got to sleep much later than planned. Well, we all have to make sacrifices for our baking projects.

July 14, 2010

Scones

I love scones. Whenever I spend some time in the UK or Ireland I eat as many as possible. Well, obviously not as many as possible - that would cause serious problems with my wardrobe... Notwithstanding my love for fresh, warm scones with clotted cream and jelly, it took me until the beginning of this year to find out that I could make them at home. For some strange reason I just thought it was a really tricky recipe. So I was very surprised, when I learned about how easy it actually is and that it only requires ingredients, that I have in my cupboard most of the time. So now the only problem is finding the clotted cream in Zurich...


This here is a basic scone recipe. I like them plain, but you could easily add raisins or chocolate chips or dried fruit. A word about the sugar: I like to use brown sugar, but of course you could also use white sugar. Also, an interesting thing happens when you lower the sugar amount to 30g: the taste of the scones will be on the verge of sweet to savory, so I imagine they would go great with e.g. gravad lax.

225g flour
1 tsp. baking powder
0.5 tsp. salt
40g sugar
40g butter, cold and in pieces
1 egg
100ml milk

Preheat the oven to 220°C. Prepare a baking tray with baking paper.

In a bowl sift together the flour, baking powder, salt and sugar.

Add the butter pieces and grind it together with the butter (ideally using cold hands) until you end up with an even, crumbly, dry mass.

In a separate bowl mix together the egg and the milk and then add it to the flour-butter-mix. Quickly blend all the ingredients, trying to knead the dough as little as possible. It doesn't matter if it still looks uneven, as long as the wet and dry ingredients are combined.

Sprinkle a little flour on the working surface and lightly flatten the dough to about 2cm. Cut the scones using a round cookie cutter of about 4cm diameter.

Bake the scones in the middle of the oven for about 12-14min until golden brown.

Eat directly from the tray, with a little clotted cream and jelly. Or, if you're more disciplined than me, let them cool down until lukewarm and serve on a nice plate. Of course, you can also let them cool down completely, but scones are best eaten when really fresh, so don't wait with eating them for longer than a day or two.

Since clotted cream is quite hard to find here in Zurich (or ridiculously expensive) I usually use double cream (fat content of about 50-60%) and beat it until fluffy.


The jelly in the picture is crab apple jelly (not homemade). I believe traditionally it should be strawberry jelly, but I didn't have that in my cupboard at that moment. And at least I bought the crab apple jelly in Edinburgh, adding a real Scottish component to my Sunday breakfast.

June 27, 2010

The Daring Bakers' June 2010-Challenge: Chocolate Pavlovas with Chocolate Mascarpone Mousse


Hooray, my first challenge as a daring baker! It included everything that I expected from this project and more. Several components would not have been on my 'to-bake'-list because e.g. I'm not too fond of meringue, too afraid of crème anglaise and too unknowing to realise that mascarpone can be made at home with only two ingredients.

Who would have thought that these three recipes worked perfectly, but not the chocolate mousse that I expected to be the easiest part of it all...

The June 2010 Daring Bakers’ challenge was hosted by Dawn of Doable and Delicious. Dawn challenged the Daring Bakers’ to make Chocolate Pavlovas and Chocolate Mascarpone Mousse. The challenge recipe is based on a recipe from the book Chocolate Epiphany by Francois Payard.

Dawn's instructions can be found here. I followed them as closely as possible, the only change being that I substituted the Sambuca with Galliano, an Italian herb liquor, because I'm not very fond of aniseed liquor and also Galliano was readily available in my house bar. Homemade mascarpone was not part of the challenge, but since I read about it in a previous challenge, I wanted to try it.

An additional challenge that was not written directly into the recipe proved to be my gas oven. The meringues had to be baked at 95°C but my gas oven could not go lower than 130°C, so I decided to invade the kitchen of friends of mine for the weekend and do the complete challenge there (THANK YOU GUYS!). This approach had the additional advantage that I had somebody to help me eat the pavlovas.

I was surprised that making the chocolate meringues was easy and also the addition of chocolate greatly added to the taste. But what really surprised me was the crème anglaise. I always thought that vanilla curd was a bit boring, but the homemade stuff is amazing! I had to stop myself from eating it on the spot. So after more than three decades vanilla and I are finally friends.

What nearly drove me to the brink of despair was the chocolate mousse. When I added the chocolate to the hot cream, the mixture curdled immediately. I could save it by adding a few tablespoons of boiling water, but I guess it never completely recovered. Then, when preparing the mascarpone-cream-mix, it broke after only a few seconds of beating. I started again with a second batch of mascarpone (this time store bought because I did not have time to make another batch) and tried to be extra careful when adding the cream. It worked, but the mousse was never as moussy and stiff as I expected it to be. Also, the texture was a little grainy. The taste was exquisite, though :-)

Since this was my first challenge, I went a bit overboard with different platings...

This is my first try: crumbled up meringue, layered mousse and mascarpone-cream with raspberries.


Second plate: a meringue base with piped mousse (although it didn't keep it's form very well).


Third plate: again, a meringue base with a few spoonfuls of mousse and fresh fruit.


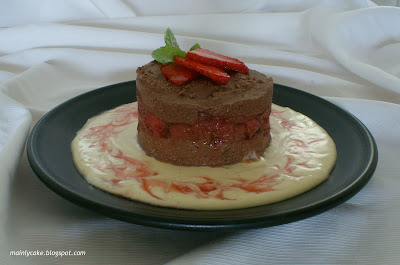
Fourth plate: I filled some of the mousse into a dessert ring, layered it with strawberries, and froze it for a couple of hours.


Fifth plate: same as before, but this time I layered the mousse with mango and passion fruit.


June 20, 2010

Vanilla-Raspberry-Cupcakes

These muffins (or cupcakes - I still haven't decided on the terminology) were specially requested for a barbecue of a friend of mine so I wanted to make them look extra pretty.


While browsing through my various baking books I came across a muffin recipe that used white chocolate chips and immediately had a vision of a muffin as white as possible with the occasional pink spot. I decided to supplement the white chocolate with almond slices and raspberries for the pink.

For the icing I wanted to use a white chocolate glazing. Now, I'm not very experienced (yet) with icings, but I found simple instructions on how to make your own chocolate glazing on the internet. Unfortunately it didn't turn out as planned. I expected a thin fluid to dip my muffins. Instead I ended up with a paste which I applied to the muffins with a spatula.

Vanilla-Raspberry-Muffins

250g flour
2.5 tsp baking powder
0.5 tsp natron
100g white chocolate chips
100g almond slices

1 egg
100g sugar
0.5 tsp vanilla extract
80ml sunflower oil
250g yoghurt
200g raspberries

Preheat the oven to 180°C. Prepare a muffin tin with paper cups (alternatively brush the tin with sunflower oil).

In a large bowl sift together the flour, baking powder and natron. Mix in the chocolate chips and the almond slices.

In a separate bowl scramble the egg and add the sugar, vanilla extract, sunflower oil and yoghurt.

Mix the dry and the wet ingredients. Carefully add the raspberries and fold them into the batter. Try not to brake the raspberries to prevent the batter from getting pink.

Spoon the batter into the prepared muffin tin and bake for 20-25min.


For the frosting melt 200g of white chocolate over a water bath together with 2 tbsp of butter and 2 tbsp powdered sugar. Apply to the cooled down muffins with a spatula and decorate with a sugar-covered almond.

June 15, 2010

Tiroler Cake

The Tiroler Cake is one of the most popular cakes in Switzerland. It's really easy to make and has a rich hazelnut flavour with the occasional chocolate chip.


 There's loads of recipes on the internet. I've used this one:

125g butter (room temperature)
4 egg yolks
1 pinch of salt
150g sugar
120g flour
8g baking powder
200g ground hazelnuts
50g chopped hazelnuts
150g chocolate chips
4 beaten egg whites

Preheat the oven to 180°C.

In a big bowl beat the butter until it is lighter in colour and fluffy. Beat in the eggs one at the time, then add salt and sugar. Sift in the flour and baking powder and add the ground hazelnuts, the chopped hazelnuts and the chocolate chips. Mix everything together. Carefully fold in the beaten egg whites.

Pour into a buttered loaf pan (25-28cm length) and bake for 50-55min. After cooling, the cake can be easily stored for a few days.

June 09, 2010

Lime-Amaretto-Slices

Wellwellwell... who would have thought, but I have to report my first baking fail... Well, not my first in total, but my first since I started blogging. I decided to try another recipe from Not So Humble Pie. I like cocktails and the idea of transforming one (in this case Amaretto Sour) into baking appealed to me on several levels, so I decided to try Ms. Humble's Amaretto Lemon Squares. 


Since I didn't have fresh lemons at home, I decided to use limes which I had available. The other change (ultimately, the one of the decisions leading to the fail) was to substitute the normal sugar for brown sugar. At the time I thought it was a great idea, thinking about Caipirinhas and Mojitos et al., not about the brown colouring this will give my baked goods...

The other problem I had was my oven. Yes, yes, I know, you should never blame others for your own faults, but you have to understand that I work with an old gas oven, that adds a few complications to every baking process. The main disadvantage is, that the heat comes only from the bottom. Also, circulation of the hot air is inhibited if I don't push the baking tray completely to the back. The heat is very difficult to regulate (turning the switch a few millimeters leads to an increase of 20-30°C and it won't allow me to set a lower temperature than 130°C. Finally, the fact that the tray is not completely levelled, does not help either. Ok, I'll stop my rant here, but I really wish I had an oven that was a tad more modern.

So, I think that my second mistake was to leave my slices not long enough in the oven, because I was afraid that half of it might burn.

All in all, the taste was great (especially immediately after cooling down for a moment) but the look was questionable. Also, it was almost impossible to transport the soft slices. Fortunately, I didn't take pictures after I plated them at my office (along with a sign "does not taste as horrible as it looks"...).

Crust
170g flour
90g powdered sugar
0.5 tsp salt
190g butter (chilled)
50g almonds (toasted for a few minutes and ground in a food processor)

Preheat the oven to 175°C.

Line a baking tray (about 25x35cm) with parchment paper and butter the sides.

In a big bowl mix together the flour, sugar and salt. Cut the butter into little cubes and rub everything together between your fingers (preferably cold fingers) until everything is a fine mix (it looks a little like grated cheese). Pour the mix into the baking tray and press it down with your fingers. Bake for about 15-18min until light brown.

Filling
4 eggs
300g sugar (white sugar, NOT brown sugar...)
4 tbsp flour
1tsp corn starch
2 tbsp amaretto
180ml lime juice
0.5 tsp almond extract
60ml milk

Combine all the wet ingredients with the sugar. Sift in the flour and the corn starch and mix well. Pour onto the crust and bake for another 20min until the filling is set and does not jiggle anymore when you shake the tray a little.

Let everything cool down, remove from the pan, cut into slices and dust with powdered sugar.

 
As mentioned above, the slices are best eaten without any transportation in between (directly from the tray to the mouth?).

June 02, 2010

Bailey's Chocolate Muffins


A few days ago, I tried out a recipe for homemade whisky-cream-liquor. Instead of drinking it all by myself, I've searched the internet for other uses. I found this simple recipe for Bailey's-Muffins on kochbar.de:

260g flour
2 tbsp cocoa powder
3 tsp baking powder
75g chocolate chips
50 g walnuts, roughly chopped

1 egg
80 ml sunflower oil
100 ml Bailey's (or homemade whisky-cream-liquor)
100g sugar
2 tbsp instant coffee powder

Preheat the oven to 180°C. Prepare a muffin tin with paper cups.

Combine the dry ingredients in a bowl and mix well.

In a separate bowl mix together the wet ingredients with the sugar and the coffee powder.

Combine the dry and wet ingredients, mix quickly and spoon the batter into the muffin cups. Bake immediately for about 25 min.

Actually, I tried something new with this recipe, because it was the first time that I froze the muffins before baking. Just make sure, that there's enough space in your freezer before starting and that you line the muffin tray with paper cups. After mixing everything together fill the batter into the paper cups and put the whole muffin tin into the freezer. After the muffins are frozen you can take them out of the tin and store them more conveniently in a plastic dish or bag or something similar. To bake just put the muffins back into the tin and put them into the preheated oven. Add about 5 min to the total baking time.

May 30, 2010

Chocolate Chip Cookies

For some time now I've wanted to try to make chocolate chip cookies. I really love them, but very often when I bought some they didn't taste exactly as expected. I've recently realized, that what I actually had in mind was not the classical chocolate chip cookie, but a shortbread with chocolate chips. This explains a lot...

Still, when I decided to make my own chocolate chip cookies, I decided to give the classical American chocolate chip cookie a try, and I'm really glad I did. But more on that later.


I researched some recipes on the internet and decided on the following four:

1. Chocolate Chip Cookie from chefkoch.de, on the picture in the middle, front.

2. Best Chocolate Chip Cookies from allrecipes.com, on the picture in the middle, back.

3. Shortbread Chocolate Chip Cookies from cooks.com, on the picture on the left side.

4. Chocolate Chip Shortbread Cookies from healthycooking.suite101.com, on the picture on the right side.

All recipes were relatively easy to make and all were edible :-)

My personal favourite was to my surprise the classical American chocolate chip cookie (no. 2). I loved the texture. It was not nearly as chewy as some of the store bought variety but soft and the taste was great.

I was a little disappointed by the shortbread chocolate chip cookies (no. 3). They didn't taste like shortbread at all. I probably should have let them bake for a few minutes longer (or flatten them more) which might have helped with the consistency. The taste was ok (kind of like stracciatella ice cream), but also a bit boring. Especially compared to the other cookies. Surprisingly, a lot of people at the office seemed to prefer them. It just goes to show that there's no accounting for taste...

No. 1 was ok, especially on the second day. They seemed a bit dry when just cooled down but developed a nicer, softer consistency on the second day. Don't know what would have happened on the third day - none of them survived as long...

A nice variation was no. 4 with orange zest, even though they didn't taste like shortbread very much. But still the texture was smooth and crumbly and the taste pleasant.

All in all, I'll definitely make no. 2 again, maybe no. 4. No. 1 was nice enough in itself, but compared to no. 2 they just didn't measure up. No. 3 was disappointing, but I might try a different recipe for shortbread at one point.


1. Chocolate Chip Cookie 
from chefkoch.de

200g butter (room temperature)
280g sugar
40g sugar syrup (you'll find a recipe to make your own sugar syrup at the end of this post)
16g vanilla sugar
2 eggs
400g flour
1 tsp baking soda
0.5 tsp salt
200g chocolate chips
100g walnuts, roughly chopped

Cream together the butter with the sugar, sugar syrup and vanilla sugar until smooth. Beat in the eggs one at the time.

In a separate bowl mix together the flour, baking soda and salt.

Combine the butter mix with the flour mix, add the chocolate chips and walnuts and quickly mix  everything together.

Let the dough rest in the fridge in an airtight container for one day.

On the next day preheat the oven to 180°C. Cover a baking tray with baking paper. Form about 50 little balls from the dough and distribute them on the baking tray leaving gaps of about 3cm between each ball.

Bake in the middle of the oven for about 15min.

2. Best Chocolate Chip Cookies 
from allrecipes.com

115g butter (room temperature)
100g white sugar
110g brown sugar
8g vanilla sugar
1 egg
190g flour
2g baking soda
5ml hot water
2g salt
170g chocolate chips
50g walnuts, roughly chopped

Preheat the oven to 175°C.

Cream together the butter, white sugar, brown sugar and vanilla sugar until smooth. Beat in the egg.

Dissolve the baking soda in the hot water and add to the dough along with the salt.

Sift in the flour and add the chocolate chips and walnuts.

Cover a baking tray with baking paper and drop large spoonfuls of the batter onto the baking tray, leaving large gaps between each cookie (at least 5cm).

Bake in the middle of the oven for about 10min until the edges of the cookies are nicely brown.
 
3. Shortbread Chocolate Chip Cookies 
from cooks.com

200g butter (room temperature)
2 cups powdered sugar
1 tsp vanilla extract
0.5 tsp salt
4.5 cups flour
80g chocolate chips
130g hazelnuts, roughly chopped

Preheat the oven to 175°C.

Cream together the butter and powdered sugar. Add the vanilla extract and salt.

Sift in the flour and mix until well blended.

Add the chocolate chips and hazelnuts.

Cover a baking tray with baking paper. Form balls of 2.5cm diameter and flatten to about 4cm diameter rounds.

Bake in the middle of the oven for about 18min until light brown.

4. Chocolate Chip Shortbread Cookies 
from healthycooking.suite101.com

50g butter (room temperature)
0.5 cups powdered sugar
2 tsp orange zest
0.5 tsp vanilla extract
1 egg
2 tbsp coffee cream (fat content of 12.5%)
1 tbsp buttermilk
1.5 cups flour
0.5 tsp baking powder
0.5 tsp salt
100g chocolate chips
50g walnuts, roughly chopped

Preheat the oven to 175°C.

Cream together the butter and powdered sugar. Add the vanilla extract and orange zest. Beat in the egg, coffee cream and buttermilk.

In a separate bowl mix together the flour, baking powder and salt.

Combine the wet and dry ingredients and beat until well mixed. Add the chocolate chips and walnuts.

Cover a baking tray with baking paper. Form balls of 2.5cm diameter and flatten to about 4cm diameter rounds.

Bake in the middle of the oven for about 18min until light brown.

Sugar Syrup

250 ml water
250g sugar

Bring water and sugar to the boil, then reduce heat and boil lightly for about 15min.